Tag: Summer

3 Ways to DIY Summer Shorts

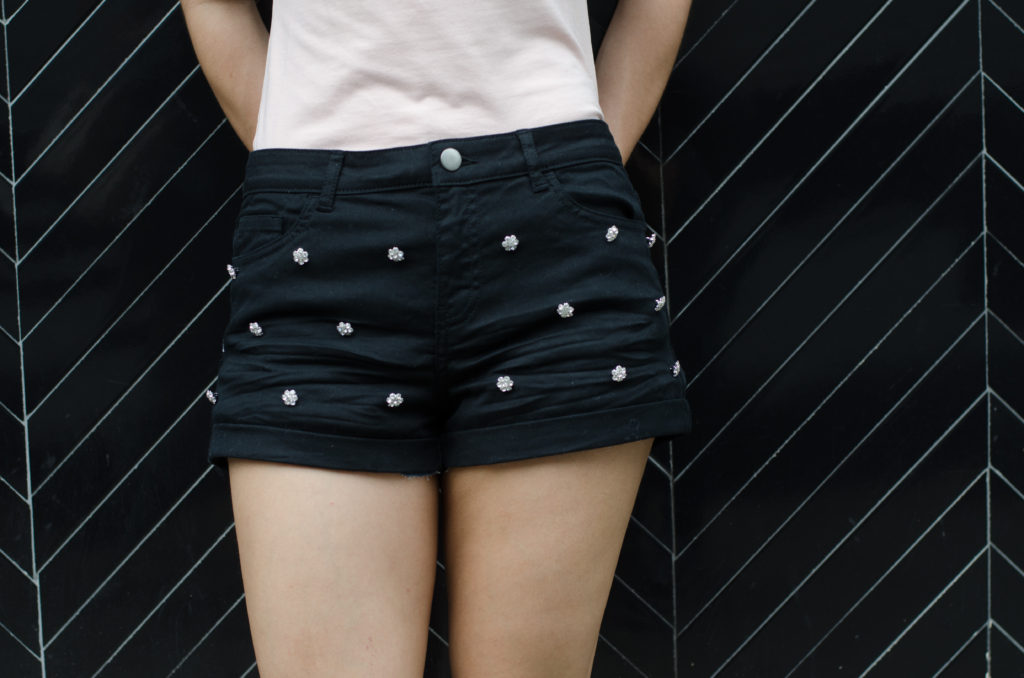
It’s getting hot out there and it’s time to bust out your Daisy Dukes. With these three easy DIYs you can take your plain old shorts and turn them into pretty little things. Check out this video to learn how to make 3 awesome pairs of shorts for the summer:

For more details:

Floral Patched Shorts

Lace Trimmed Shorts

Rhinestone Bling Shorts 

DIY: Rhinestone Bling Shorts

Can you take a pair of casual shorts and turn them into a hot little number for a night out? You absolutely can, and should. These cute little rhinestone buttons add the perfect amount of bling to a plain pair of shorts. Check out the video below to see how to make them and scroll down for more details:

What you’ll need:

A pair of shorts

Rhinestone buttons like these (make sure you select 14mm Crystal/Silver)

Needle and Thread

Tailor’s chalk

1

Using tailor’s chalk, mark where you want the buttons. I spaced them out about 3 inches or so in an alternating pattern.

2

With a needle and thread sew the buttons on using the shank in the bank.

3

Repeat step 2 wherever you’ve marked a spot with the chalk.

That’s it!


DIY: Floral Patched Shorts

Summer = Flowers

Summer = Shorts

So Shorts = Flowers!

That’s the formula for this super simple floral patched shorts that will make your summer outfit stand out, whether you’re at the beach or on a night out. Check out the video below to see how to make them and scroll down for more information:

Here’s what you’ll need:

A pair of shorts

Iron On Floral Patches like these

Scissors

Iron

1

I wanted to cut the patches so I can place half inside the pocket and half along the pocket. This is totally optional. You can get creative with this step by mixing in other patches or putting it on the back pocket instead.

2

Place the patch where you want it and using a teflon sheet or a thin cotton cloth (to protect the patch) press and hold down the iron (heat on high, no steam) for 20 seconds. Repeat if necessary.

3

Guess what? That’s it. Simplest formula and simplest DIY ever!

DIY: Lace Denim Shorts

Lace and denim just seem to go hand in hand don’t they? I personally think it’s girly in the nicest way. Check out how you can make these adorable shorts to complete your summer attire. Check out the video below to see how to make them and scroll down for more information:

Here’s what you’ll need:

A pair of denim shorts

Lace like these

Thread and Needles

1

Before I started, I cut two inches off the bottom of the shorts. I did this to accommodate the extra length the lace was going to add. This is optional but odd lengths on shorts can be extremely unflattering so I would suggest doing it.

2

I then started sewing the lacy about three inches in. I made small stitched every half inch or so along the top of the lace. I started and ended at the inner seam for a clean finish.

3

You need to around the whole leg and then repeat it with the other side.

That’s it!


Spring Summer 17 Trend Alert: Straw and Wicker

This summer’s latest trend is straw and wicker hats, bags and furniture. With Scandinavian influences, the trend embraces natural fibers and un-dyed, light colors. The pale shades of lemon yellow and creamy beige are light and sunny and will instantly turn any outfit into a summer look and any room into an airy oasis.

The original straw and wicker trendsetter is Jane Birkin, circa 1974 with her iconic basket bag but the upcoming trendsetter is you, circa now. So gather your looms and weaving materials, and come on a straw studded journey through this summer’s latest craze.

FRANCE – FEBRUARY 08: Jane Birkin Posing With Her Little 10 Month Old Daughter On The Boardwalk In Nice On September 9, 1972. The 28 Year Old Actress Was Then On The Set Of The Film Trop Jolies Pour Etre Honnetes, Directed By Roger Balducci. (Photo by Keystone-France/Gamma-Keystone via Getty Images)

First up, straw hats and bags with inspired verbiage like “do not disturb”, “beach please”, “out of office” and more. The large, script, playful letters in contrasting blues and reds make this style really pop and come to life. It’s great when your accessory can speak for you with a little message and it’s a whimsical look perfect for the beach or pool. 

Eugenia Kim’s Hats are so adorable (and so DIY-able) (Source)

In the home décor world, we have outdoor woven furniture. Rattan and wicker has returned and natural furniture pieces are making a comeback. Whether the piece is retro or modern, designers are foregoing all things heavy and dark for a refined “back to nature” look.

(Source)

This summer, drop your leather bags and hardwood and opt to accessorize with your new favorite materials.  The look may have started with the Scandinavians but it ends here with you.

DIY: Floral Patched Jeans

Seems like patches are everywhere since spring of last year. And they don’t look like they’re going anywhere. One of the more popular incarnations of this trend are the floral patched jeans. Watch this video to see how you make your own and scroll down for more detailed instructions.

What you’ll need:

A Pair of Jeans

Iron On Flower Patches – We used this, this* and this

Iron

You can also keep a cotton cloth handy for using over the patches while you iron.

Step 1: Place the patches where you want them. It might help to wear the jeans and mark the spot where you want the patches to finally be.

Step 2: Using an iron on its hottest setting, press down on each patch for 20 seconds at a time. Repeat if necessary. Using a cotton cloth over the patches while you iron will protect your jeans and your patches. Do not use steam for this step. Repeat on the other leg.

Tip: Let the glue cool before moving your jeans around or wearing them.

That’s it. You’re done!


*This item is currently unavailable. Check out our full selection of floral patches.

DIY: Rhinestone Hem Jeans

If minimalism is your style but you have a soft corner for some bling this DIY is for you. This easy tutorial will show you how to give your jeans a little glitz and glam. You can dress it up and dress it down as you please. Watch the video to see how to make them and scroll down for more detailed instructions.

What you’ll need:

A Pair of Jeans

Iron-0n Rhinestone Trim

Sew-on Jewels

Needle and Thread

Scissors

Iron

Step 1: Measure the bottom of your jeans and cut the rhinestone trim to that measurement, adding an extra inch.

Step 2: Iron on the trim slowly making sure you apply heat uniformly. You can use a cotton cloth over the trim to protect it from the heat. Do not iron on the steam setting. Add the second row.

Step 3: Using the sew on jewels, make a three petal flower at the center. Using a needle and thread, sew through the jewels till they feel secure.

That’s it, you’re done!

DIY: Rose Embroidered Vans

What do you do when a cool new pair of shoes hits the market and everyone has a pair? You customize yours so you can be a dolphin in a sea of sharks. The new Vans Old Skool sneakers are ultra cool and since they’re unisex it seems like EVERYONE is wearing them. And they should. But what if you could take it to the next level with a feminine touch with this rose embroidered patch.

What you’ll need:

Vans (or any sneakers you wanna switch up)

Rose Iron-on Patches

Iron

Glue (If the patch is being stubborn in places)

Scissors (If you want to trim the patch to fit the shoes)

Also keep a cotton cloth handy for the ironing part.

Step 1: Decide how you want the patch placed on the shoe. I chose this single rose embroidered patch to be placed along the side of the shoes.

Step 2: Making sure the patch is where you want it, place the cotton cloth over it. Press down with the iron, supporting inside with your hand. Hold down for 20 seconds. Repeat if necessary.

Step 3: Do it on the other side and repeat with the other shoe.

And you’re done!


DIY: Beaded Summer Sandals

It’s time to free those toes! Put away the stuffy boots and slide into some flirty sandals, because spring is here! We just got these great new beaded iron-on trims and had to put them on something quick. 

What you’ll need:

A Pair of Sandals

Beaded Rhinestone Trim (This one is Iron-On but we didn’t want to iron it onto vinyl)

Pom Pom Trim

E6000

Scissors

Step 1: Cut the trim to size by measuring it on the sandals. To play it safe, cut a little extra on either side. You can always trim that later.

Step 2: Apply a thin line of E6000 on the the strap. Stick the pom pom trim to it with the pom poms facing outward.

(E6000 is a great glue but make sure you’re working in a well ventilated area since it’s a powerful formula. It also takes longer to dry than other glues. You can use a glue gun for quicker results)

Step 3: Apply glue between the two pom pom trims and glue on the rhinestone trim. Since this is an iron on trim you have the option of ironing it on if your base fabric will allow it.

Step 4: Trim the excess on either side and let dry.

And you’re done!

DIY: Gucci Inspired Studded Acid Wash Denim Jacket

Who would have thought these trends make a comeback! Studs on Acid Washed Denim! Gucci this Spring took these popular 80s trends, put them in a blender and out came this:

We thought we’d take this hot trend and turn it into a fun, easy DIY. We love recreating runway looks for those of who you love fashion but don’t want to break the bank. The first thing we did was hunt for the perfect denim jacket – something slightly oversized to match the current trending silhouette. We bought a classic blue Talbots denim jacket and headed back to HQ to get started on the project.

What You’ll Need:

Step 1: Remove all the buttons from the jacket. We wanted to replace the plastic buttons on the jacket with cool metal ones. This step is optional. If you like the current buttons on your jacket, skip this step.

Step 2: Fill a spray bottle with bleach. Make sure you wear rubber gloves to protect your skin. We advise that you work in a well-ventilated area when working with bleach. Keeping the bottle about 6 inches from the jacket, start spraying in random sections. Don’t spray too much! You’ll notice the color stripping away. Let it dry and then wash it.

Disclaimer: Bleach strips dye from fabric and sometimes reflects the undertones present in the dye. For example, you might see yellowish or pinkish tinges based on your denim’s original wash/dye.


Step 3: Start attaching the studs. For the studs with prongs, poke it through the fabric and use pliers to bend the prongs inward into the hollow of the stud. For the studs with screws, use a sharp tool (scissors/awl/X-Acto knife) to make a small hole and push the screw in. Then screw the stud onto the screw.

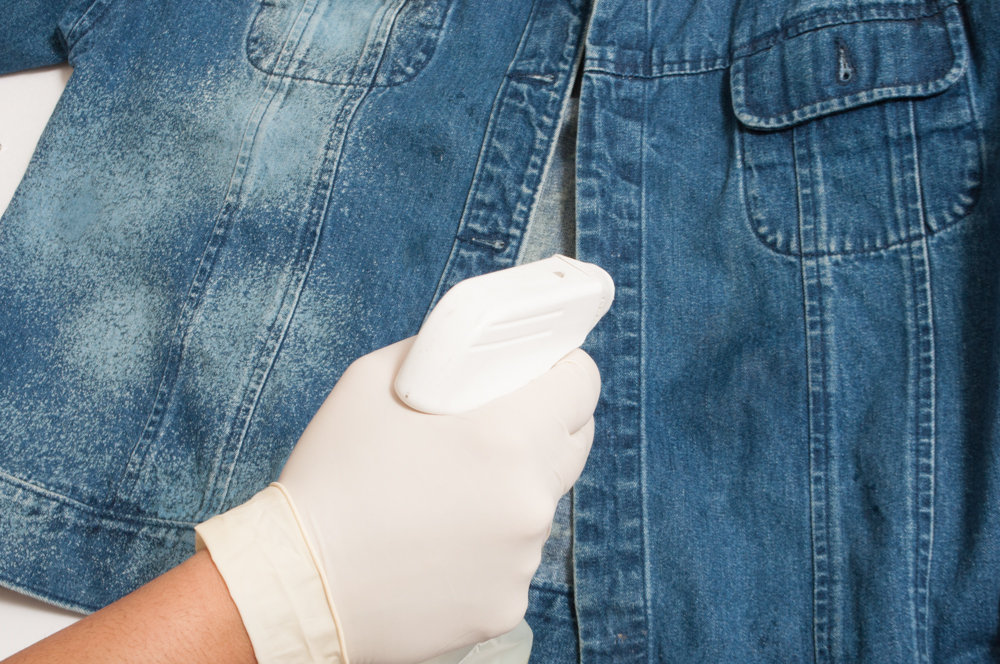
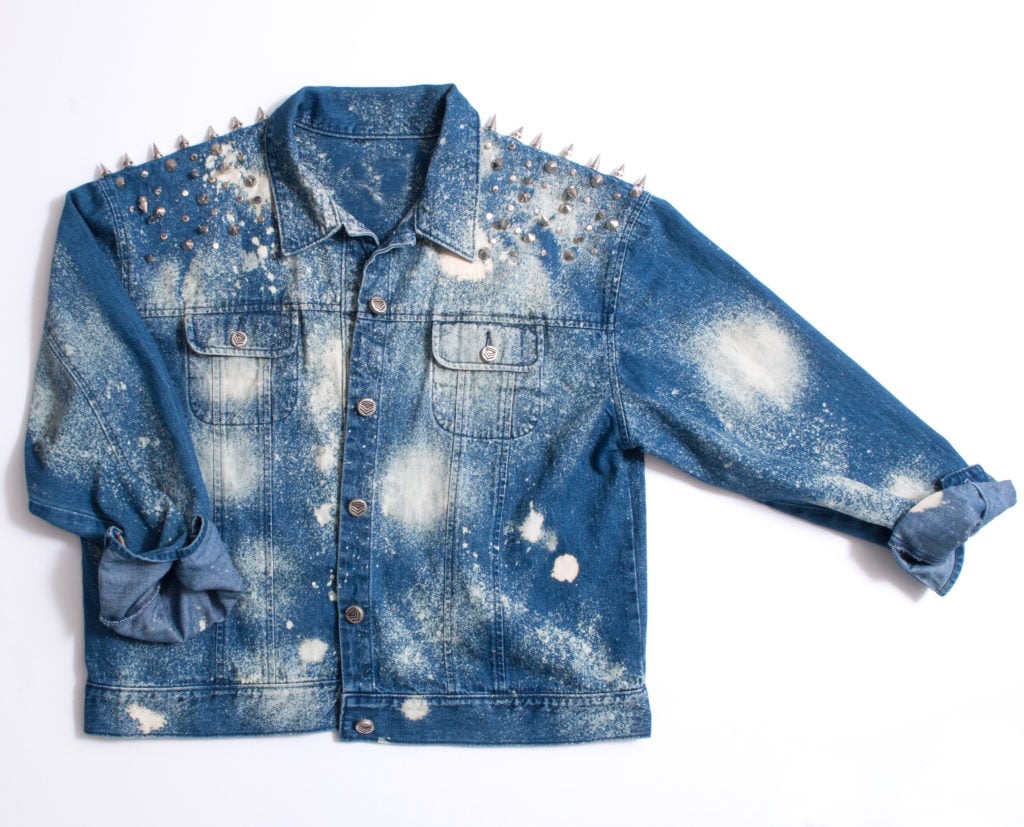
Starting at the shoulder, attach as many studs as you like.

Step 4: Sew on the new metal buttons. Again, this step is optional.

And you’re done! If you wanna buy this jacket go here. Hurry! There’s only one.


Studs used in our project:

Small Metal Spikes with Screw
Large Cone Spike with Screw
Medium Spike with Screw
Small Flat Nailheads
Cone Nailheads