Tag: Crafts

Back To School 2018: DIY Preppy Backpack

It’s that time of year again, the one that students dread and parents love: Back to School Season. The fall semester starts in about a month so it’s about time to start creating some great new school supplies, for a great price! I am going to start this series with an essential: the backpack. Today, we are creating the perfect, basic, preppy-style backpack which is perfect for every student who wants to update their backpack for the new school year!

Today’s Look: The Preppy Student
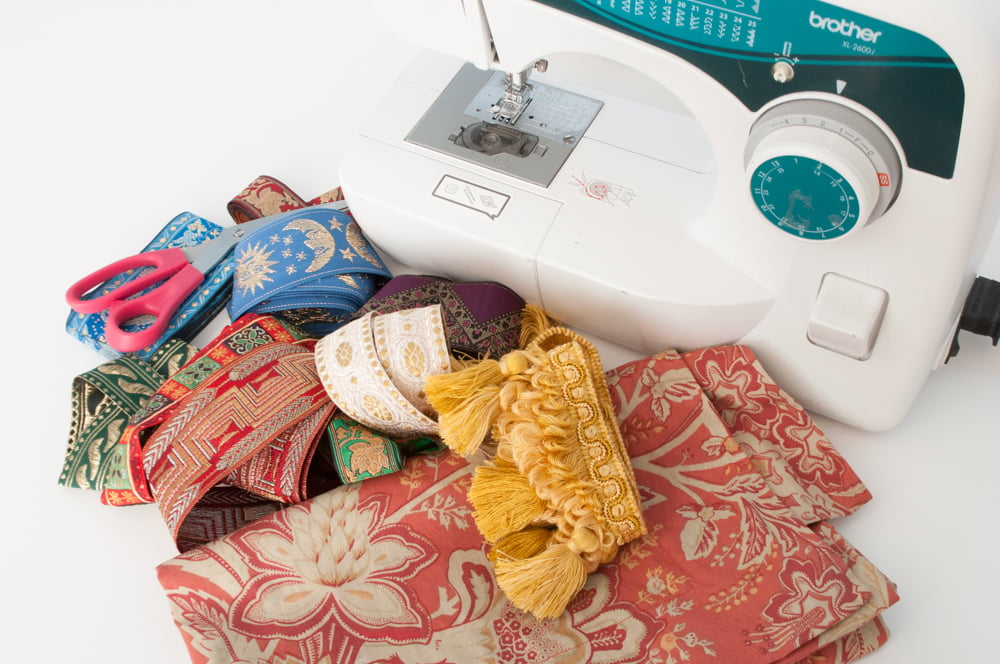
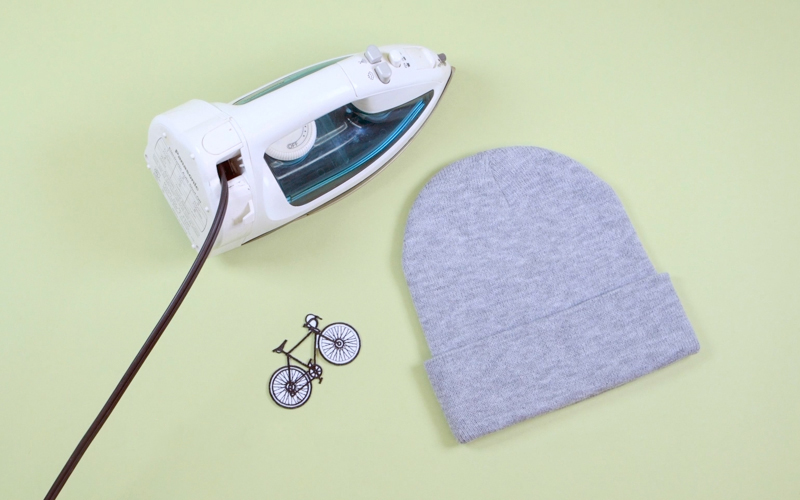
What You’ll Need:

Instructions:

Step 1: Cut zipper tassels already on bag off with scissors. Then, loop leather cord through zipper and cut to desired length, making a loop.


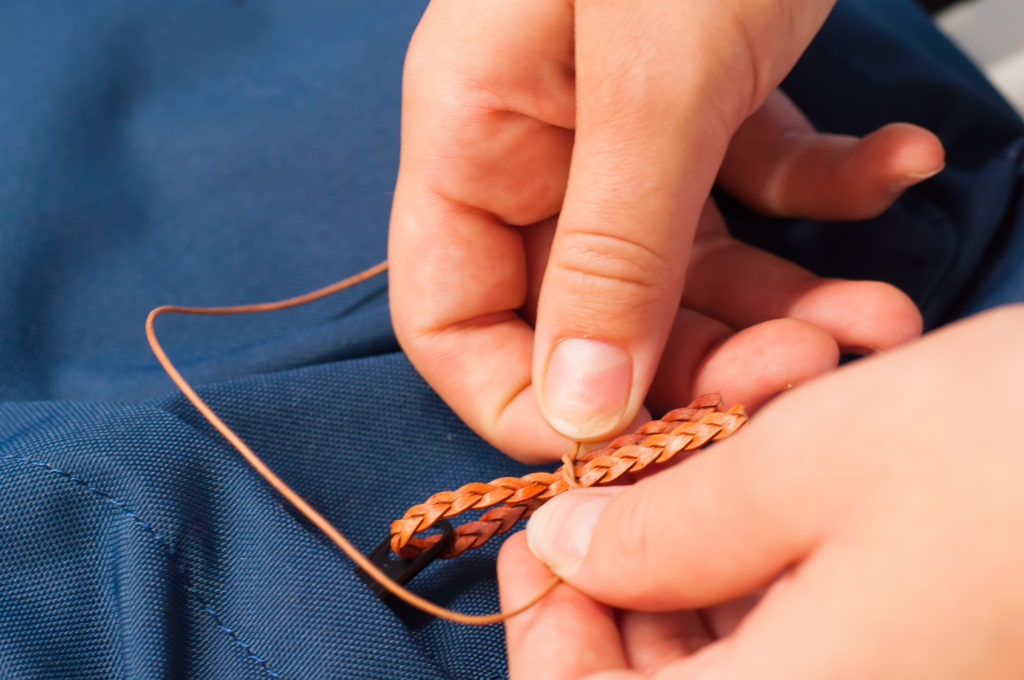
Take thinner cord and tie in a knot around the loop to hold it together. Wrap thin cord around and then tie in a knot twice to secure. Cut off excess of both cords. Repeat for all other zippers on bag.

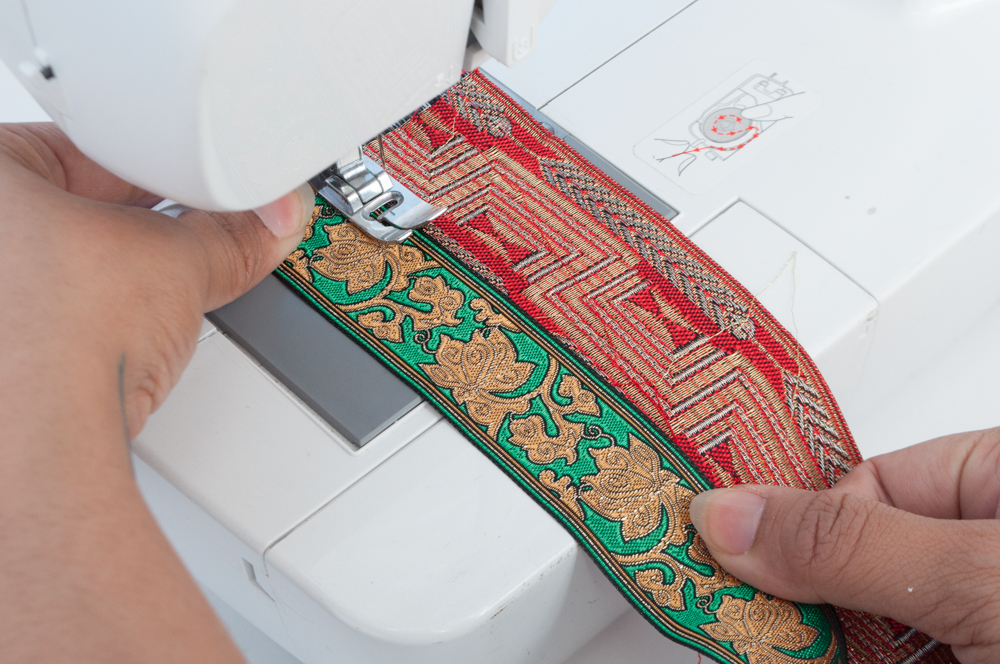
Step 2: Take white grosgrain ribbon and striped grosgrain ribbon and layer them on top of each other, then glue with E6000 glue. Wait for it to dry a bit, then you can begin to line your backpack with it.

Glue ribbon to the inside part of the zipper flap and then fold to begin lining the backpack along the zipper.

Continuously glue as you go until the ribbon is all the way across the top of the backpack. To finish, fold over flap and glue, the same as when you started the ribbon.

Step 3: Using the same ribbon layered and glued on top of each other, glue to the side pockets of the backpack (if there are any) using E6000 glue. Tip: Use binder clips to secure ribbon while drying to make sure it stays in place!

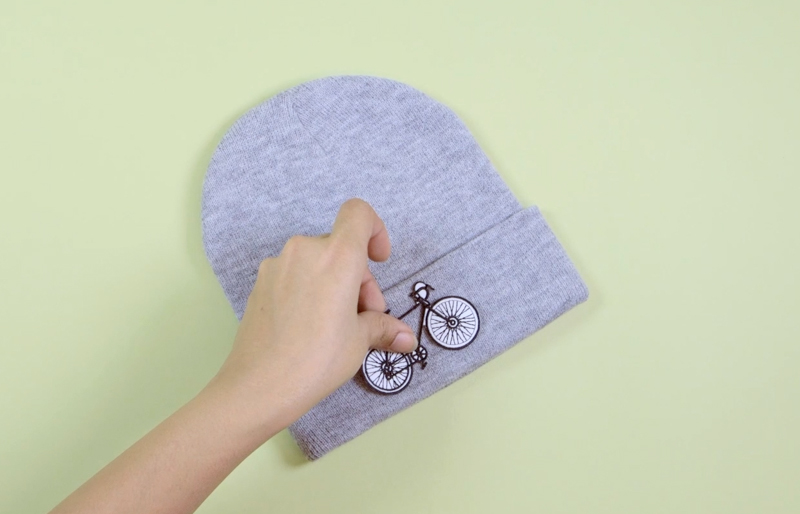
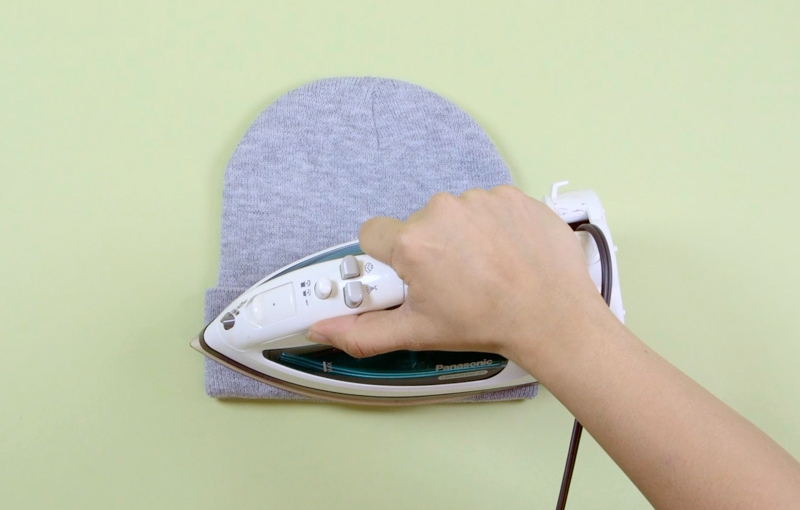
Step 4: Now we are going to apply the letters! Lay out your monogram in the desired order and lay a thin piece of fabric on top in order to protect the letters from the iron.

Then, use your iron to press down onto the patches for about 20 seconds, or until they are attached to the bag.

Remove fabric for the finished look!


DIY: Jungalow Dorm Room

If you love plants and the word “Jungalow” is unfamiliar to you, you should get acquainted, quickly. The true queen of Jungalow is Justina Blakeney, with her ‘jungaliciousness’ (her word) decor and homes. It combines bright colors and organic textures with nature. It’s not a hard look to achieve and if you can’t keep plants alive just find some real looking fake ones. Besides, if you’re in college, looking after yourself is hard enough. I have two easy DIY’s to add some color to your Jungalow.

Beaded Jungle Lamp

I found this fabric in our fabric drawer and I couldn’t believe how perfect it was for this DIY. I decided to sew a lampshade for it that fit one of the frames I had. You could just modify an existing lampshade or buy one for cheap at a thrift store. And you can substitute the printed fabric for solid colors if that’s more your style.

Here’s what you’ll need:

A lampshade

Beaded Fringe

Sequin Patches – We used this, this and this

Sewing Machine or Strong Fabric Glue

Iron

1

First, start by placing your patches on your lampshade. Since I made mine I could lay it flat, but if you have a pre-made one you can pin your patches to it for placement. Once you have them where you want them, cover them with a thin cotton cloth. Using an iron on it’s hottest setting, press and hold down for 20 seconds at a time. Repeat if necessary. Be careful, the metal of the lamp will get hot too. For all those of you who own a hair iron, you can use that too.

*DO NOT do this while the lamp is still plugged in.

2

Once all the patches are ironed on, start pinning the beaded fringe to the fabric. If you’re going to be gluing it to the lampshade you can skip this step. Pin the fringe and the fabric with their ‘right’ sides facing each other.

3

If you’re using glue (I suggest Sobo Craft Glue or E6000), start gluing the fringe in sections to the inside of the lampshade for a neater finish. You can use binder clips to keep it in place while it dries. I would sew a few stitches by hand just to secure it.

If you’re sewing it to a lampshade, sew along the pinned fabric, removing the pins as you go along.

Now plug that lamp in and watch the beads catch the light.

Jacquard Bed Scarf

You must be wondering what a bed scarf is. Trust me, the term is new to me too. I just called it that decorative quilt-like thing at the foot of the bed. So that’s what a bed scarf is. I decided to use all the beautiful jacquards that we have and it totally goes with the Jungalow theme.

You’ll need:

Jacquard trim – We used the following:

1 ½” Ivory and Gold Jacquard

30MM Metallic Jacquard

2″ (50mm) Sun Moon Jacquard

Embroidered Metallic Jacquard

50MM Imported Wine Metallic Jacquard

53MM Fine Imported Jacquard

1 ¼” Metallic Jacquard Red/Gold

40MM Metallic Jacquard Red/Green


Tassel trim

Scrap fabric – You can choose a print you like that complements the jacquard

Scissors

A sewing machine – If you don’t have a sewing machine you can glue the trims together but I strongly recommend sewing

1

Plan the arrangement of your trims. Take a picture when you’re done so you know the order you want them in.


2

Take the first two trims and lay one over the other, overlapping very slightly. Now sew along the edge making sure you’re sewing both together. Repeat this process with the all the trims.


3

When you’re done with all the jacquard, place the tassel trim with the tassels at one end of the scarf, facing away from the edge; right side facing down. Next,  take the scarp fabric and lay it over the the tassel trim, sandwiching it in between.


4

Sew along about 1/2″ from the edge. You can leave the fabric in the back unfinished and cut it to about 2 inches or you can do a double fold and sew it. Repeat this for the other side of the scarf. I added a top stitch just to make it more sturdy.


And Voila. Jungalow done.


DIY: Rope Basket

I know this DIY’s been making the rounds for a while now and I wanted to jump in and try one myself. I did want to put a spin on it by using different types of ropes so I get different textures instead of sticking to cotton rope. Check out these easy steps to make your own rope basket.

What you’ll need:
  • Rope (I used this one and used about 15 yards)
  • Glue Gun (and at least 10 glue sticks)
  • Spray Paint (optional)
  • A shape to mold your basket around. Something uniform in shape or tapering to the bottom works best. I use this lampshade I had lying around
  • Tape

1

It’s important to know what shape you’re going to end up with. In my case, my lamp shade which I’m using as a base, is round. So I glue the rope on itself with the smallest turn.

If I was making a rectangular basket my first turn would be long.

2

You then have to keep adding a thing line of glue and wrapping the rope around the first turn. Keep doing this till you finish the bottom of your basket.

3

Once you reach the size you want, place the lamp shade or whatever base you’re using over it and make sure the bottom is one turn bigger than the bottom of the lamp. You then start applying glue on top the rope instead of the side and start wrapping it around the lamp.

Keep in mind you’re not gluing the rope TO the lamp shade. You’re just using it as a shape to mold your basket around.

4

Let it cool for a couple of minutes and take the basket out.

5

This step is optional.

I taped the top edge of the basket and added two coats of silver metallic spray paint. Make sure you do this in a well ventilated area and wear a mask to protect yourself.

DIY: Multicolor Lettered Clutch

I’m sure you’ve seen the graphic clutches on the runway the last couple of seasons, with everything from patches to embroidered letters. Now you can make your own.

Watch the video to see how to make it and scroll down for more detailed instructions.


What you’ll need:

A Clutch/ Flat bag

Markers

Iron On Letters like these

Iron

Tip: Use a teflon sheet or cotton cloth to cover the letters when you iron them.

Step 1: Color in the letters. This step is optional. I just wanted something more personalized. You can even dye them for a more uniform color.

Step 2: Place the letters how you want them.

Step 3: Covering the letters with a cotton cloth or teflon sheet, iron in sections, holding the iron down for 20 seconds at a time. Repeat if necessary.

Go on now, flaunt your new clutch.

DIY: 3 Ways to Use Iron-On Letters

Always wondered how to use iron on letters? Here’s 3 fun ways you can use chenille or embroidered letters to add some character to your projects. Add it to a clutch, a sweatshirt or monogram your pet’s name on its pillow!

Check out this video to see how you can use iron on letters in 3 fun ways:

Click on the links below for more detailed instructions:

Multicolor Lettered Clutch

Lettered Sweatshirt

Monogrammed Pet Pillow

DIY: Monogrammed Pet Bed/Pillow

Here’s a DIY for the great loves of our lives, the little puppers and kitties. We think they deserve a nice monogrammed bed or pillow. Watch the video to see how to make it and scroll down for more detailed instructions.

What you’ll need:

Dog bed/pillow

Iron On Letters like these

Iron

Tip: Use a teflon sheet or cotton cloth to cover the letters when you iron them.

Step 1: Place the letters where you want them.

Step 2: Covering the letters with a cotton cloth or teflon sheet, iron in sections, holding the iron down for 20 seconds at a time. Repeat if necessary.

That’s it, you’re done! Your little fur ball is going to feel like royalty on this new pillow.

Make sure the fabric your ironing on can take the prolonged heat. Check care instructions.

DIY: Rhinestone Beanie

Trend spotting from NYFW? RHINESTONES! Add a great detail to your beanie with this DIY! (Because, a little glitz never hurt anyone!) A needle and thread is all it takes for this fun look!

What you’ll need: 

Beanie

M&J Rhinestones 

Needle

Thread

Scissors

beanierhinestone-1

beanierhinestone-2
Step 1: Place in the center and sew using threaded needle until secure.

beanierhinestone-3

beanierhinestone-4
Step 2: Add gold rhinestones on both sides.
beanierhinestone-5
Step 3: Add silver rhinestones next.

You’re all set!

Customize your own beanie here! 

And be sure to watch our Youtube tutorial!

DIY: Patch Beanie

The winter months can seem a bit long and dreary. (No better time for a DIY project, duh!). Make your cold weather accessories fun and unique with our customizable beanies. Just pick your custom patch and beanie color and follow these easy steps for application!

What you’ll need:

Beanie

M&J Bicycle Iron- On Patch

Iron

beaniepatch-1

Step 1: Place patch wherever you desire on the beanie. beaniepatch-2

Step 2: Carefully, with a hot iron press firmly down on the patch and surrounding area.

beaniepatch-3

Step 3: Hold for 20 seconds. Check to make sure it is firmly in place. beaniepatch-4

beaniepatch-5

and…. Voilá! You’re done!

Customize your own beanie here!

Be sure to watch our Youtube tutorial!


DIY: Romantic Lace Candle Holder

Nothing sets the mood like candles. Update your plain glass candle holders with some gorgeous, sexy lace! Check out these simple steps:

RED LACE CANDLE HOLDER

What you need.jpg

What you’ll need: 

Glass Candle Holder

Hot Glue Gun

Scissors

Approximately 1 foot of red lace  (depends on the size of your holder)

Measure the lace.jpg

Step 1: Measure the amount of lace needed to wrap around your candle holder.

Cut to size.jpg

Step 2: Cut excess material, leaving a little extra for a neat finish.

DSC_0813.jpg

Step 3: With the hot glue gun, add a line of glue on the glass where the lace will begin.

DSC_0814.jpg

Step 4: Begin to wrap lace around the holder, sealing it at the end with another line of glue.

DSC_0816.jpg

Step 5: Complete by folding and glueing the end.

Put a white candle in it and light it up!

BLACK EYELET CANDLE HOLDER

What you need 2.jpg

What you’ll need: 

Glass Candle Holder

Hot Glue Gun

Scissors

1 foot of black eyelet

Apply a small amount of glue.jpg

Step 1: Starting at the bottom, add a pea size amount out of glue

Start by glueing.jpg

Step 2: Begin to wrap lace in upward motion, adding small amounts of glue throughout

Glue at the end.jpg

Step 3: Seal end with a pea size amount of glue.

Cut excess.jpg

Step 4: Cut excess lace.

Fill with a candle, light, and enjoy!

DIY: Holiday Greeting Card

Love is a present you don’t have to wrap but you can always express it with a card. To make it extra special, make it yourself! We’ve come up with three easy tutorials for cute holiday cards that your loved ones will swoon over.

RIBBON STOCKINGS

dsc_0788

What you’ll need:

Card stock paper

Printable artwork (click to download)

Ribbon (3 types)

X-acto knife

Tape

dsc_0791dsc_0792

1.Print the provided artwork on the card stock. Then with the X-acto knife, carefully cut the inside of the stocking out.

dsc_0797

2. Cut each ribbon into a 2″ piece. You should have three different pieces in the end. Make sure you’ve selected ribbon that’s wider than 1.5″.

dsc_0800
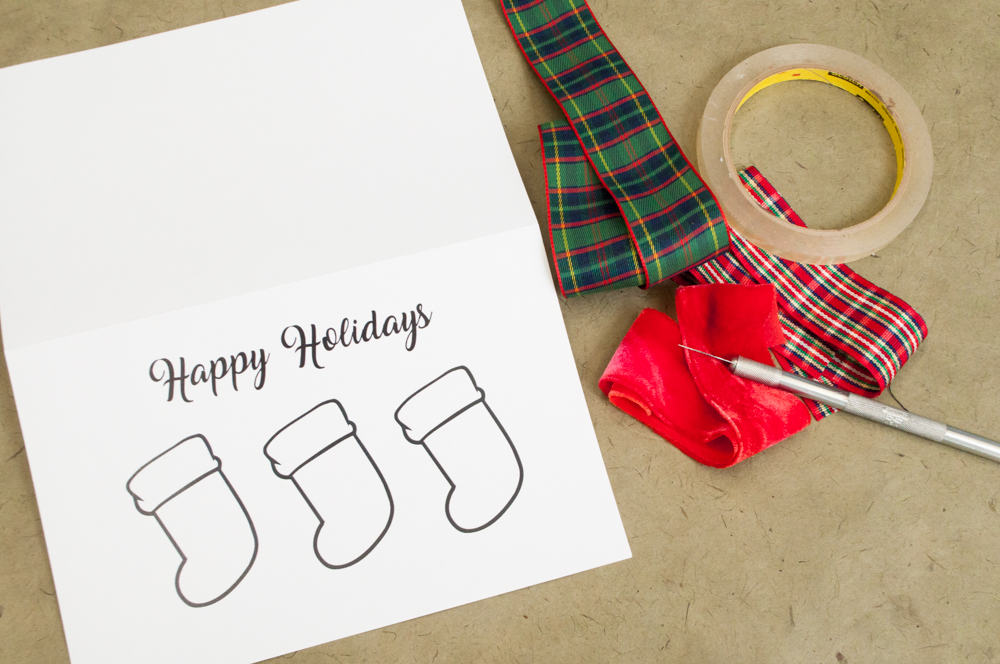
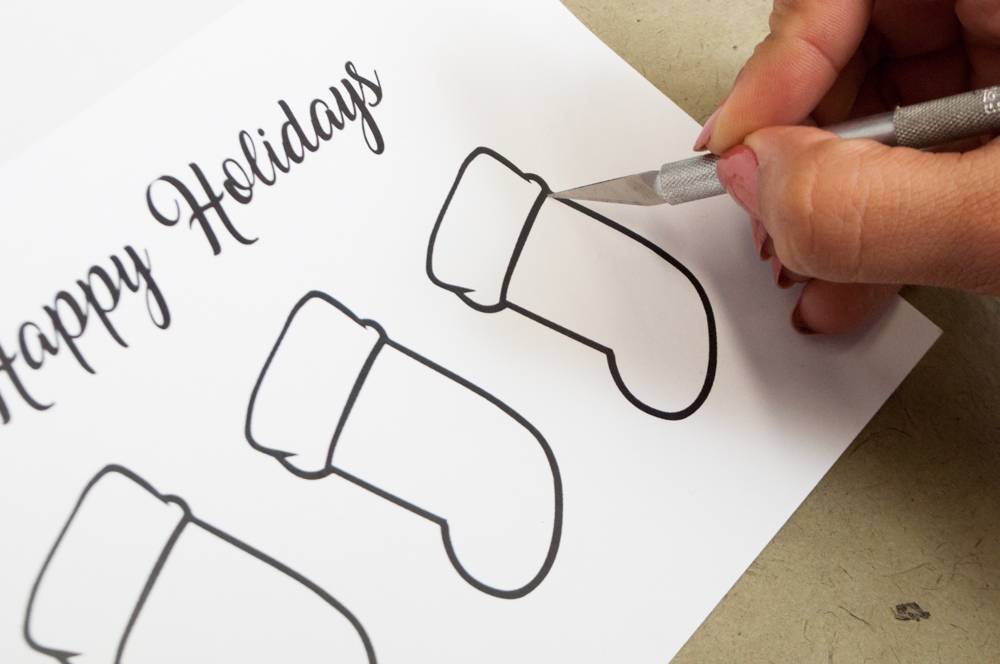
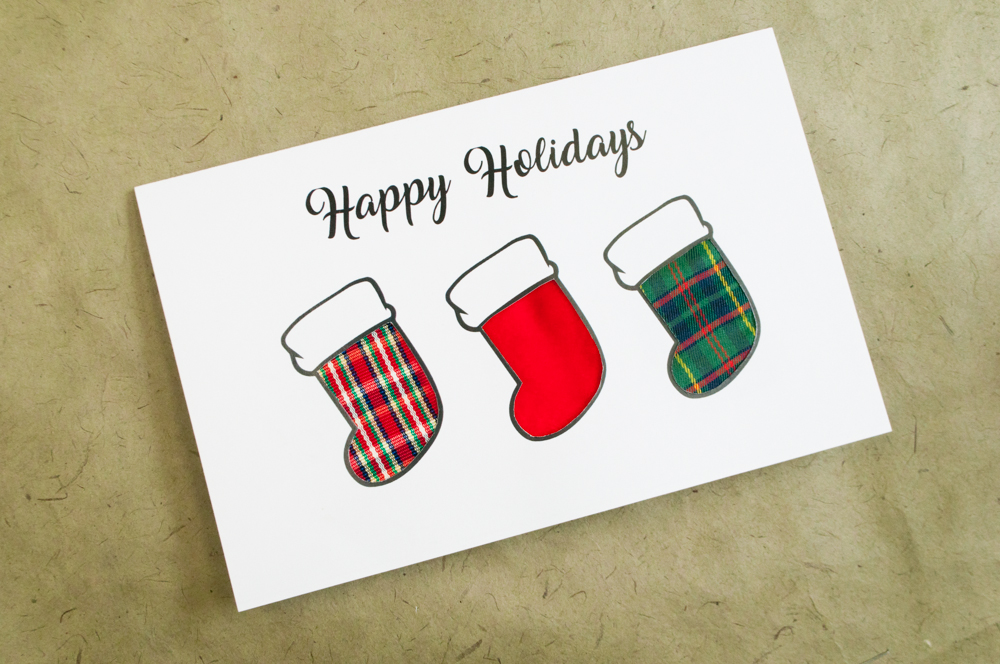
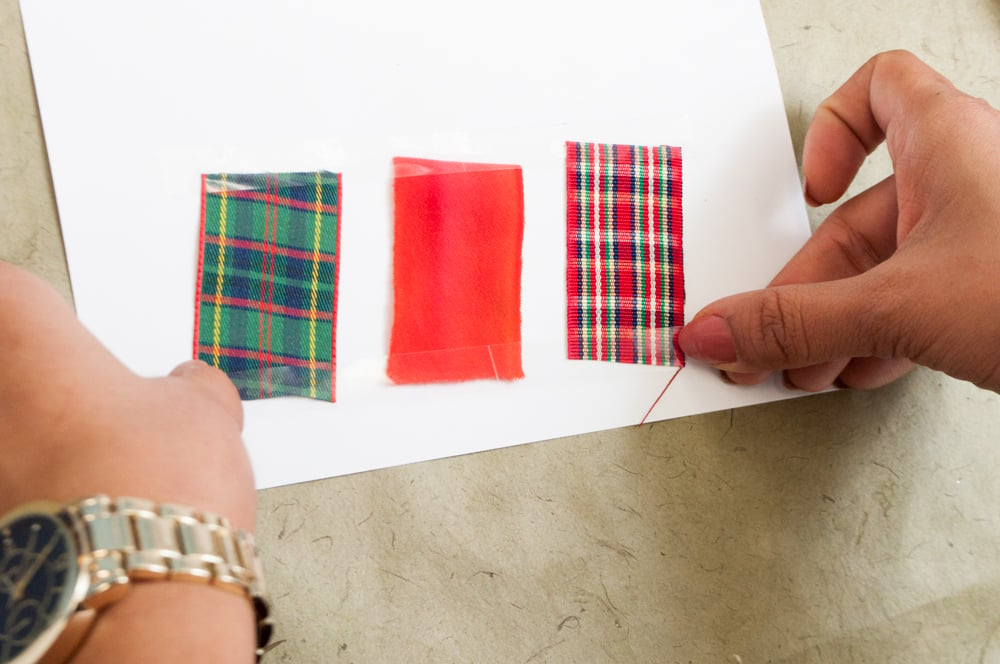
3. Tape the three pieces behind each cut-out in the card, making sure it’s fully covered.

dsc_0802

4. Paste another piece of card stock on the inside for a clean finished look.

dsc_0803

And you’re done!


MINIMALIST TREE:

dsc_0812What you’ll need: 

Card stock

Printable artwork (click to download)

Colorful buttons

Glue

dsc_0813
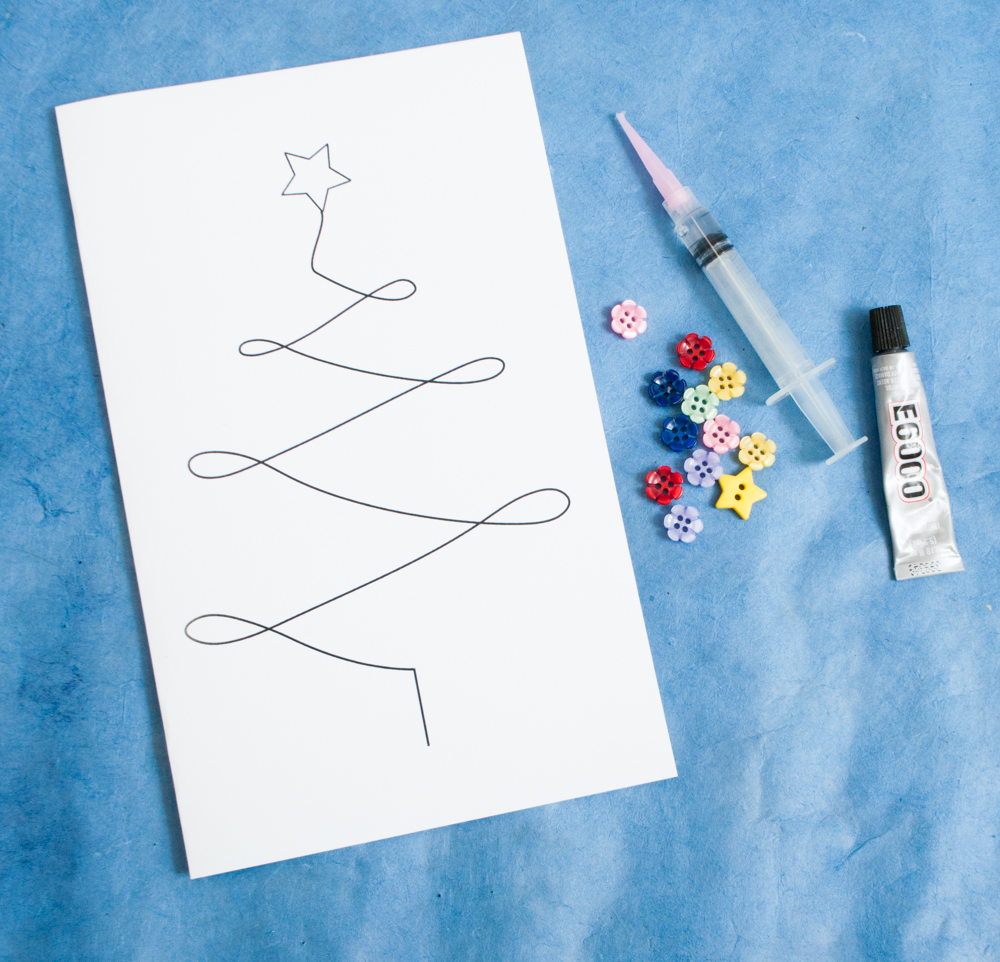
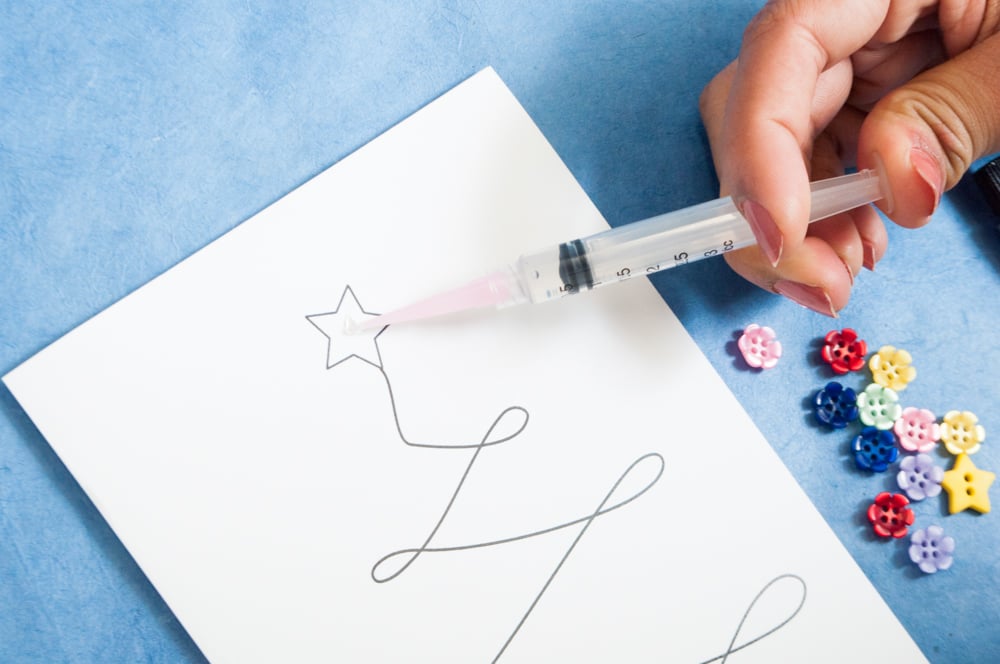
1. Print provided artwork on cardstock. Apply glue and start glueing your ornaments (buttons).

dsc_0814dsc_0817dsc_0819
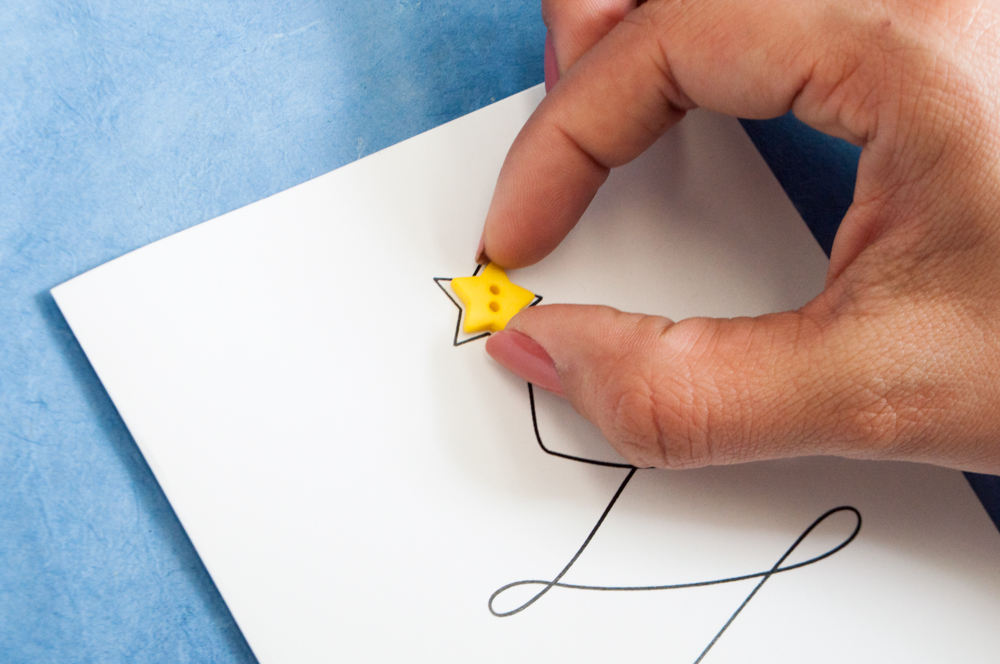
And you’re done! Simple right?


BUTTON WREATH:

dsc_0806What you’ll need:

Card stock

Printable artwork (click to download)

Green and red buttons

Glue

dsc_0807dsc_0810
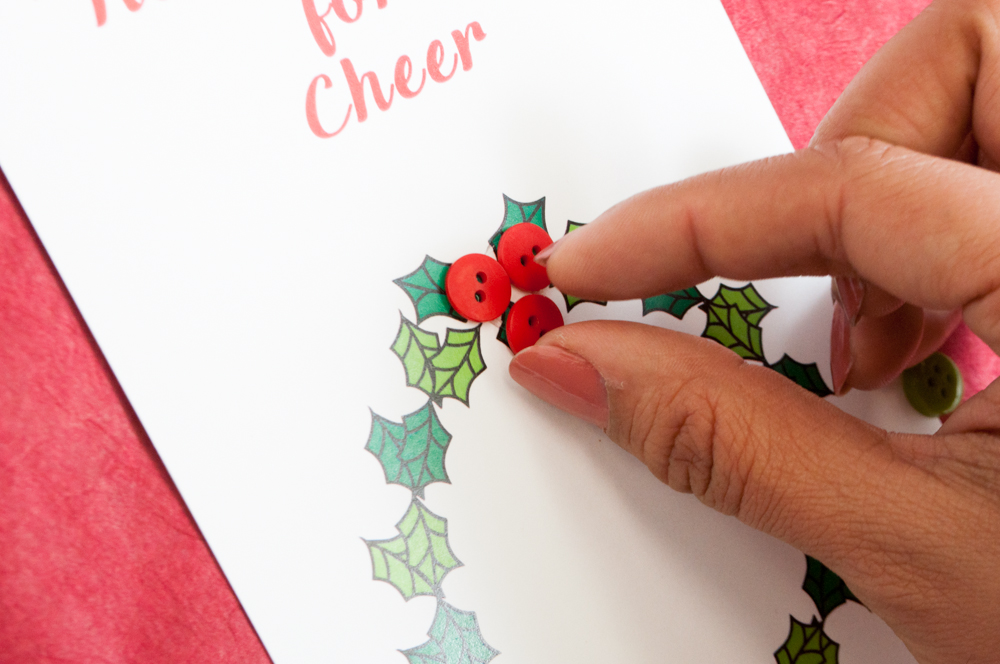
1. Print provided artwork on card stock. Apply glue to the top of the wreath and place three red buttons for the berries.

dsc_0811
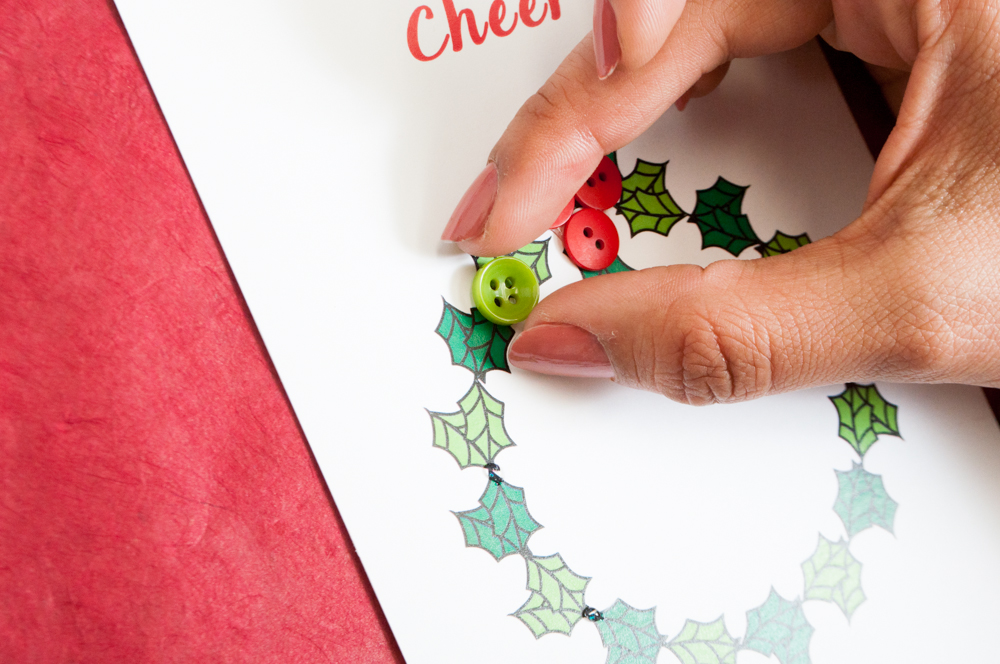
2. Glue green buttons around the wreath.

dsc_0827
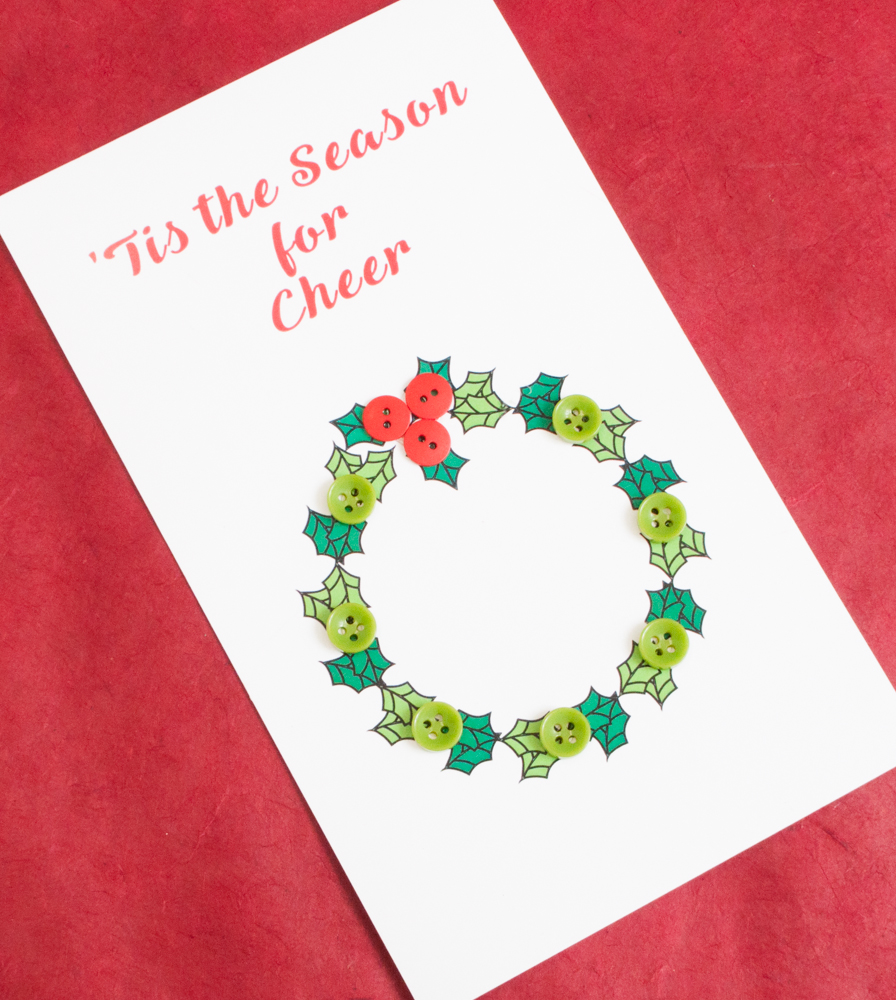
Voila! Happy Holidays!!!