Tag: Decoration

DIY: Tassel Wall Hanging

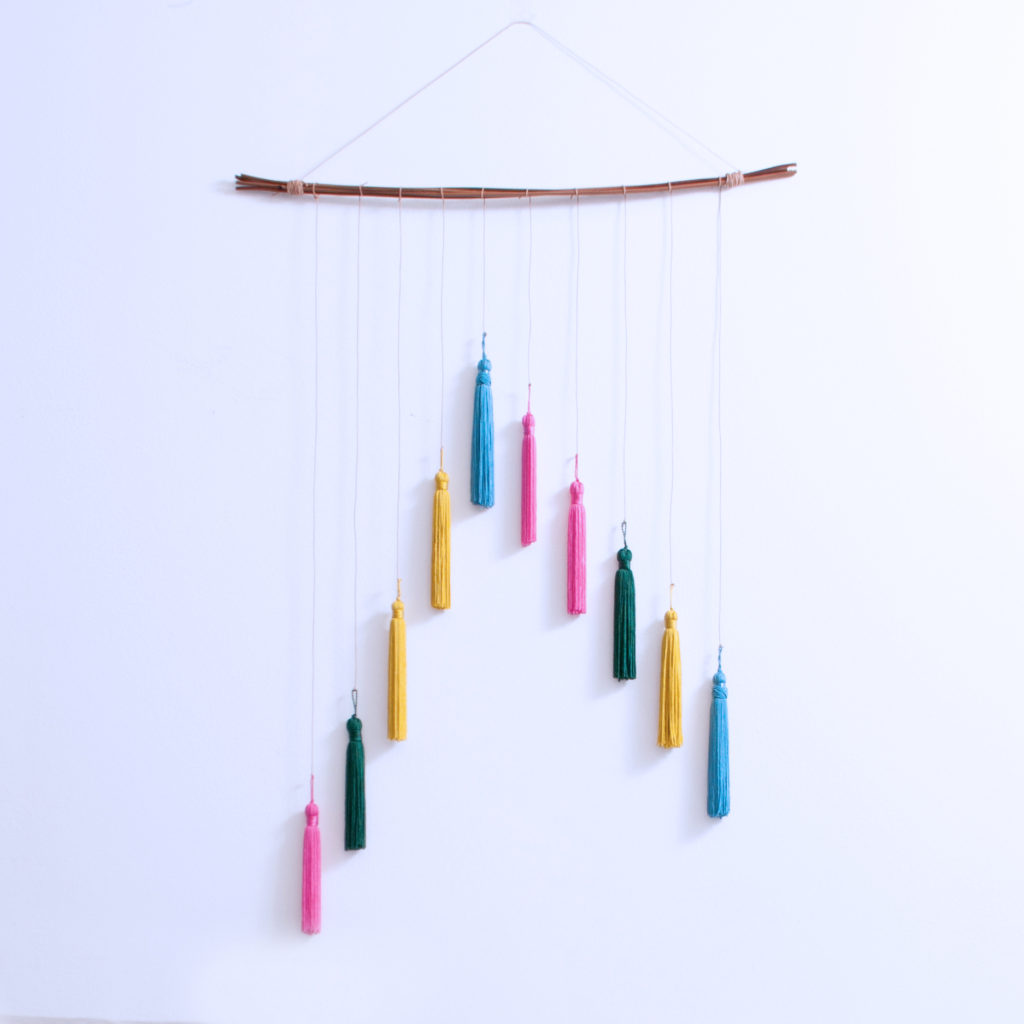
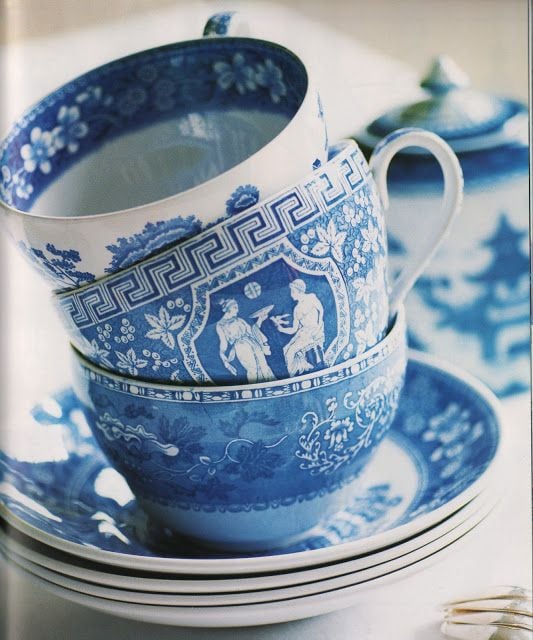
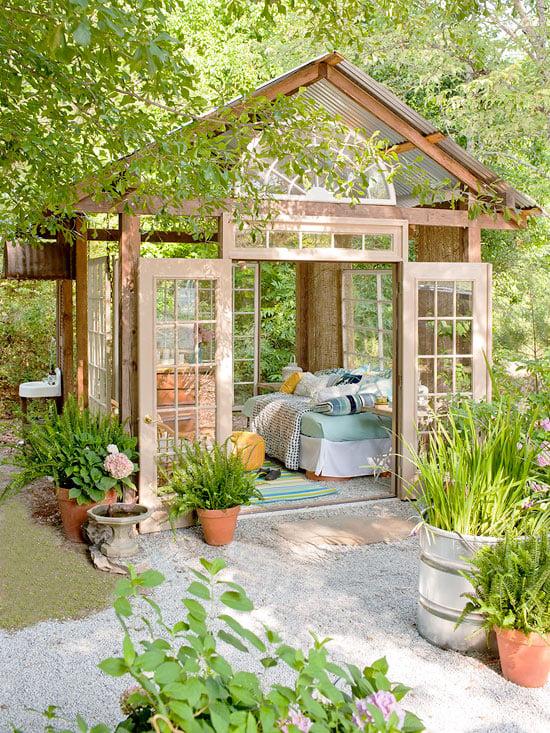
Wall hangings have been all the rage the last year or so and the trend doesn’t seem to be dying down. Whether it’s a woven tapestry, macrame or fringe, a handmade wall hanging is a beautiful addition to any room. I decided to use the stunning colorful tassels we have and make a simple hanging that is vaguely bohemian.

What you’ll need:

A dowel or sticks (I used long thin sticks from the floral section of the craft store)

Twine/Cord

Tassels (I used multiple colors but you could also try the all white or all black look)

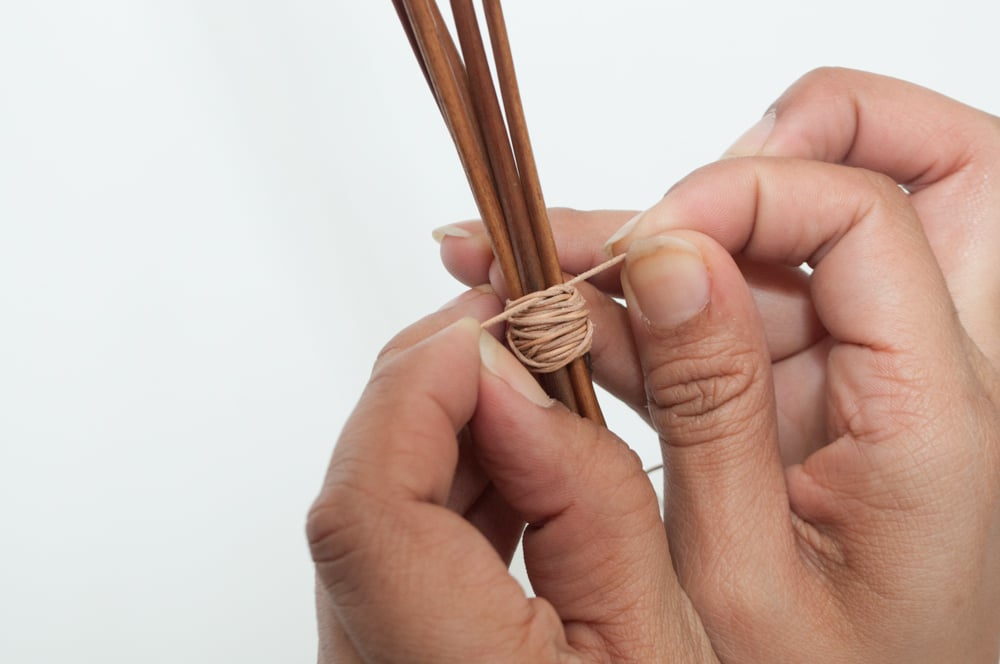
Step 1: If you’re using multiple thin sticks, bind together a few to make it more sturdy. You can skip this step if you use a dowel.

Step 2: Decide how you want your final hanging to look. Do you want them all the same length? Do you want a ‘V’ Shape? I chose to do an asymmetrical upside down ‘V’. Keeping your design in mind, tie the cords to the sticks and cut to whatever length you need.

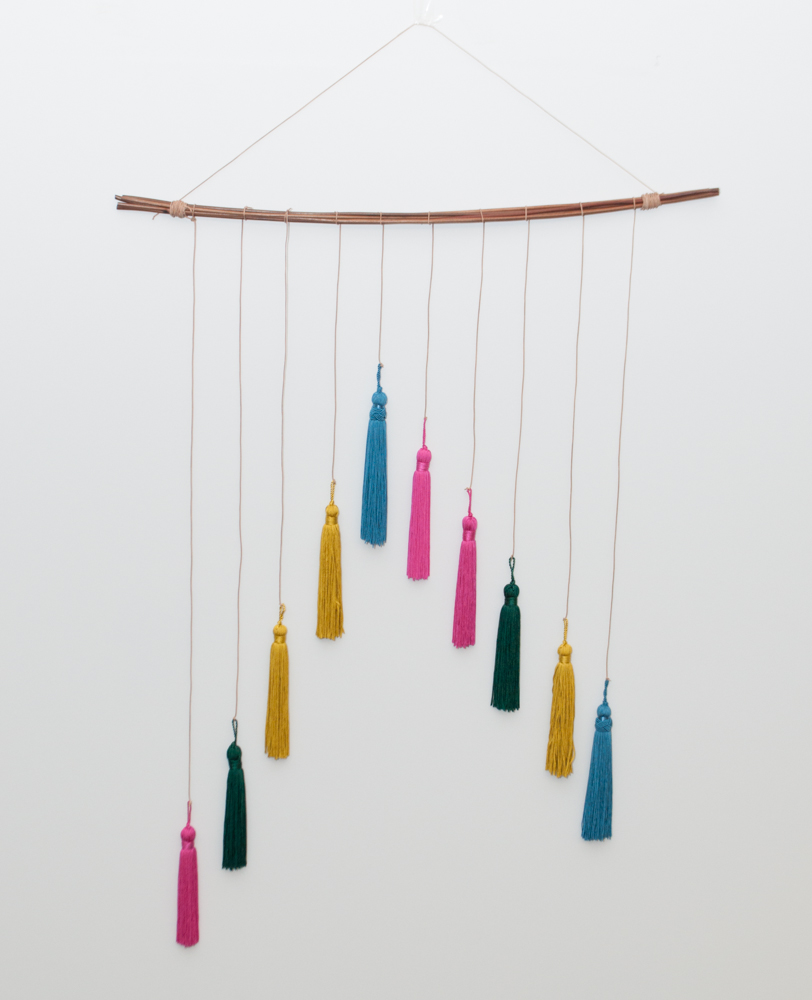
Step 3: Using the loops, attach the tassels to the ends of the cords.

Step 4: Tie a cord on both ends of the stick to hang the hanging from.

And you’re done!

DIY: Tassel Pillow

Have an old pillow you want to give some life to? Just grab a few tassels and add them all around. Tassels are a fun addition to a lot of home decor projects. Check out how we updated this pillow:

What you’ll need:

A pillow cover/pillow

Tassels

Needle and Thread

Step 1: Starting with a corner, sew a stitch from the back of the pillow and then sew it back through.

Step 2: Using the loop on the tassel, fasten it to the cover by repeating the first step.

Step 3: Just add more tassels all around the pillow.

And you’re done!

Check out this video for more ideas on making cool pillows:


DIY: Romantic Lace Candle Holder

Nothing sets the mood like candles. Update your plain glass candle holders with some gorgeous, sexy lace! Check out these simple steps:

RED LACE CANDLE HOLDER

What you need.jpg

What you’ll need: 

Glass Candle Holder

Hot Glue Gun

Scissors

Approximately 1 foot of red lace  (depends on the size of your holder)

Measure the lace.jpg

Step 1: Measure the amount of lace needed to wrap around your candle holder.

Cut to size.jpg

Step 2: Cut excess material, leaving a little extra for a neat finish.

DSC_0813.jpg

Step 3: With the hot glue gun, add a line of glue on the glass where the lace will begin.

DSC_0814.jpg

Step 4: Begin to wrap lace around the holder, sealing it at the end with another line of glue.

DSC_0816.jpg

Step 5: Complete by folding and glueing the end.

Put a white candle in it and light it up!

BLACK EYELET CANDLE HOLDER

What you need 2.jpg

What you’ll need: 

Glass Candle Holder

Hot Glue Gun

Scissors

1 foot of black eyelet

Apply a small amount of glue.jpg

Step 1: Starting at the bottom, add a pea size amount out of glue

Start by glueing.jpg

Step 2: Begin to wrap lace in upward motion, adding small amounts of glue throughout

Glue at the end.jpg

Step 3: Seal end with a pea size amount of glue.

Cut excess.jpg

Step 4: Cut excess lace.

Fill with a candle, light, and enjoy!

Greek Key Decor Inspiration

From chevron to stripes, we love all types of patterns at M&J Trimming! They immediately add interest and perk up plain pieces. From fashion to home decor, we’ve seen a lot of patterns take seasonal center stage and reign as the “it” pattern. But today’s we’re talking about a pattern that will always make a comeback: Greek key. Also known as the meander, this pattern features a repeating line motif that can add Mediterranean charm to any home.
M%J Trimming: Greek Key DoorsThis ornate door featuring Greek key is definitely the gateway to paradise. M&J Trimming: Greek Key Staircase RunnerThis Greek key runner is perfect for adding pizzazz to an already elegant stairway.

M&J Trimming: Greek Key PoolRecall the Greek Isles with a Greek key-tiled pool.

M&J Trimming: Greek Key Blue and White Tea CupsEven your tableware should rock a bit of Greek key. These blue and white teacups and saucers are so beautiful!

M&J Trimming: Living Room with Greek Key CarpetAn easy way to add impact to a room is through a patterned rug, and this blue key carpet looks perfect!

DIY: Brilliance Embellished Blossom Bottle

If you’re looking for an easy way to add glamour to your decor, look no further than this DIY. It’s easy to make if you’re no stranger to a paint brush, and will instantly make your room look and feel more stylish. We used acrylic paint and our new Brilliance rhinestones to turn a basic glass bottle into a colorful flower vase.
DSC_0088

Materials:

Brilliance SS20 Fuchsia Crystals

Small Glass Bottle

Acrylic Paint

Paint Brush

E6000

Glue Syringe

Crystal Katana
DSC_00951. Begin by framing the rectangle glass bottle with paint.
DSC_01082. Add flowers with your paint, and let it dry.
DSC_01123. Glue Brilliance crystals to the centers of the flowers you painted, and let dry.DSC_0125

DIY: Nautical Wreath DIY

Memorial Day is this weekend, and that marks the unofficial start of summer! Get your home ready for the sunny days of summer with a warm summer wreath! We used a basic wreath and wrapped it with ribbon and jute to give it a fun nautical feel.

DSC_0768

Materials:

Wooden flat circular wreath

1.5” Heavy Apron Tape

Small Tubular Jute

1” Stitched Grosgrain

7/8” Grosgrain Ribbon

Scissors

Hot Glue

 DSC_0770
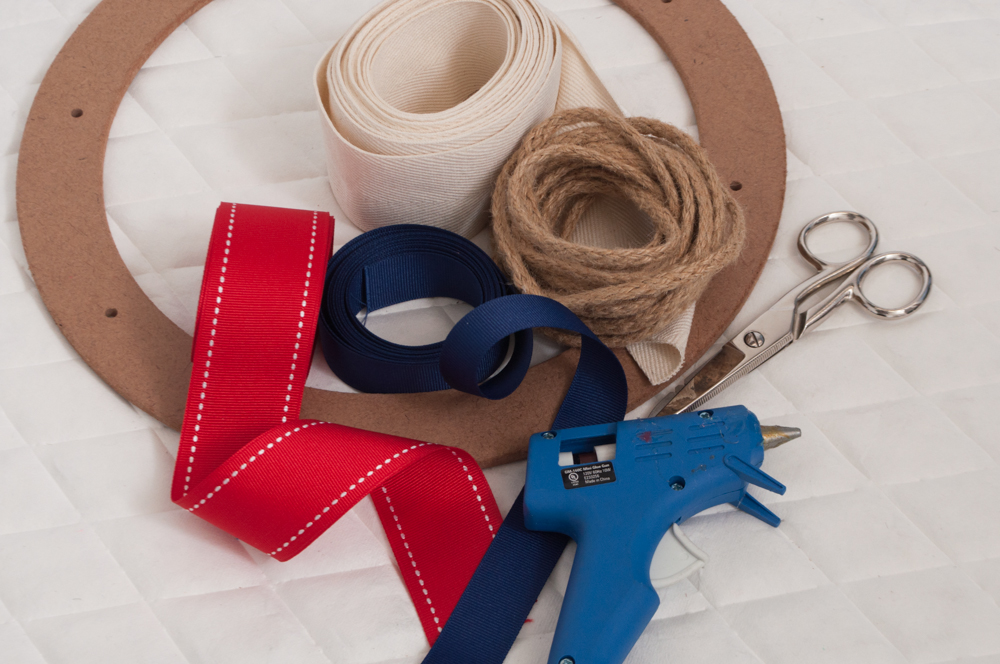
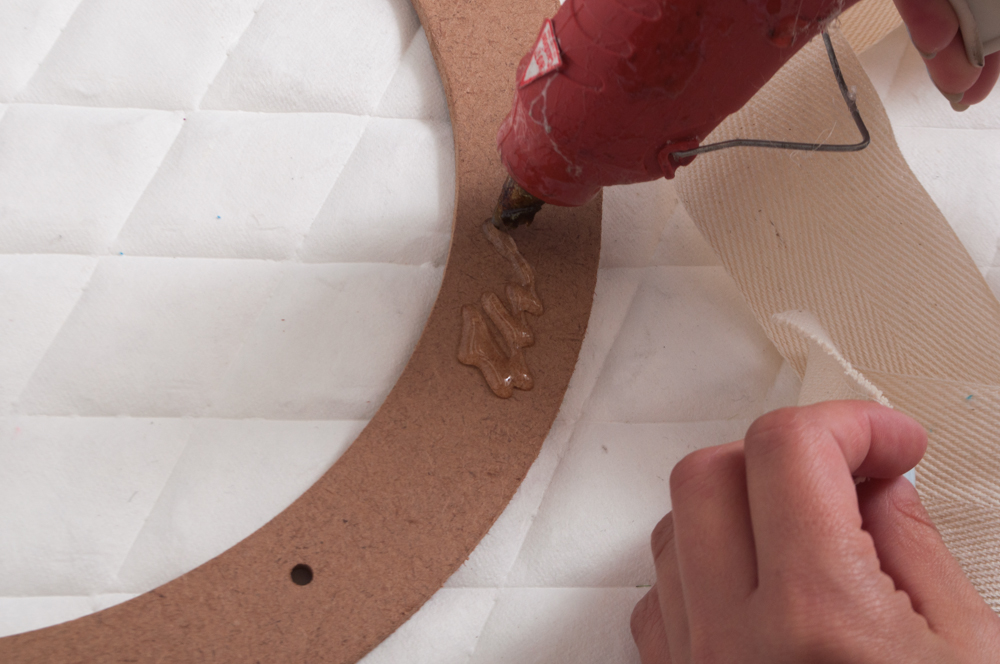
1. Take your apron tape and glue the tip down on the back of the wreath.

DSC_07742. Start wrapping around the entire wreath until you meet the area you started with.DSC_07773. With the excess tape create a continuing loop for hanging the wreath once it is complete. Glue the end to the back and cut excess.

DSC_07864. Take your jute and glue the tip into the back of the wreath under the tape.

DSC_07915. Wrap around wreath until you reach the end. Cut and glue tip into the tape behind the wreath.

DSC_0792
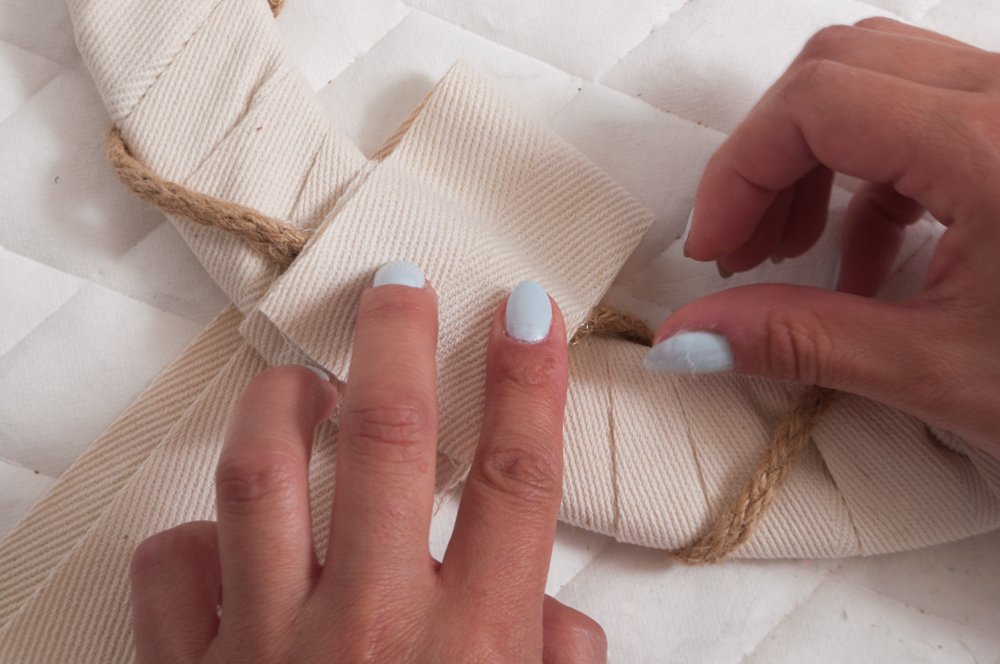
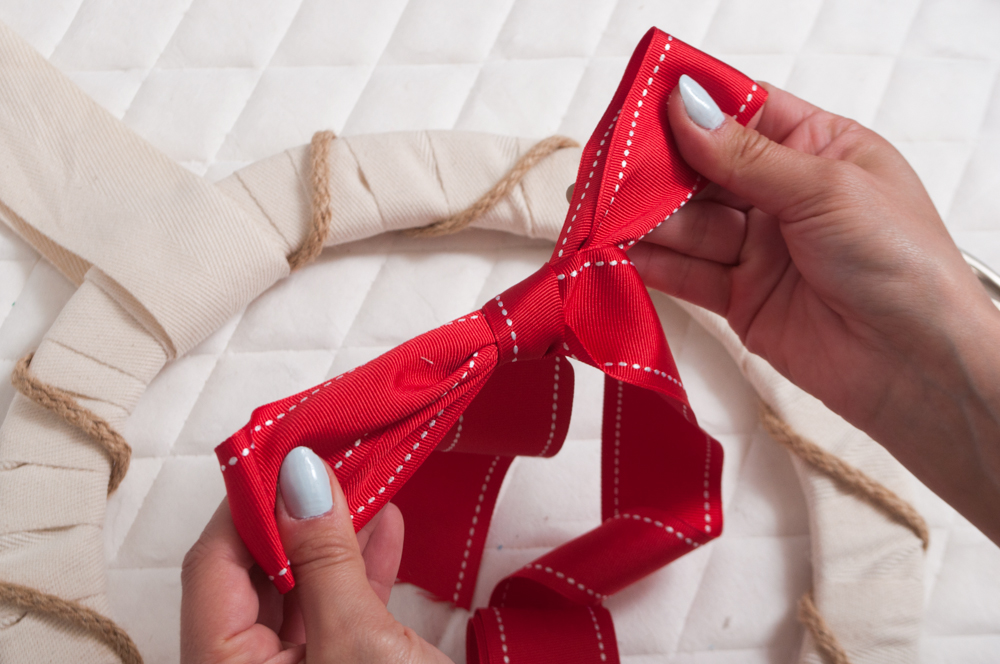
6. Create two bows with the red and navy ribbon. Glue red one down and then the smaller navy one on top.

 nautical-wreath

Ceramics as Centerpieces

We often hear the phrase, “it’s what’s on the inside that counts”, and while it’s true in most cases, today we’re making an exception. We’re looking at the inspiring vessels for flowers, foods and drink that are making a comeback in homes all around the world: ceramics. Unique ceramics are becoming statement and conversation pieces that can make their way into any room of the home. They’re also readily available for purchase from artists all corners of the earth and hit all price points, making this truly accessible art. The best part? There are so many styles from modern to rustic, that you’re sure to find the piece for you!
Ceramic-Hanging-Pot1


26984146_004_f


d6209eca12693abebda8f0153b51f759


Anticipation_780x1172


tumblr_lfdkddK01N1qecfdw

Easter Party Inspiration

If you’re throwing an Easter party this Sunday, but you’re scrambling for clever ideas to make your party stand out check out these adorable ideas! F29MoqOe1OC4aF5a0wyG6dlkMi1oM2S1FhchnR6-QzEBunnies are a must at almost any Easter party, and we love these little moss-covered cuties!

11974a2ed4e98f4bb163371e80af58eeDon’t let all of the jellybeans go to your head, there’s plenty of room for cake at an Easter party! Especially one that’s THIS cute.


carrot-crafts-5Decorate your party space with some veggie garlands! Carrots are a fun and unique addition to your decor.

e89bd6c454bdaa397d434cf1c0d737f0Pastels are the perfect palette for spring festivities! Baby blues, pinks and spring yellows are the ideal colors for a celebration this sweet!


15-EggCartonA carton of eggs makes the best set of vases for flower cuttings and looks so cute when clustered together!


1Bold paper blooms help to really make your party vibrant!


DIY: Embellished Easter Eggs

One of our favorite Easter events is decorating the eggs! There are so many fun and unique ways to make your eggs stand out. You can use ribbon, buttons, and countless other embellishments to decorate. This year add a little dazzle to your Easter celebrations with metallic accents and rhinestone embellishments!
DSC_0715

What You’ll Need: 

Faux Eggs

Gold permanent marker

Rhinestones

Crystal Katana

Syringe


Green Egg:

DSC_0721
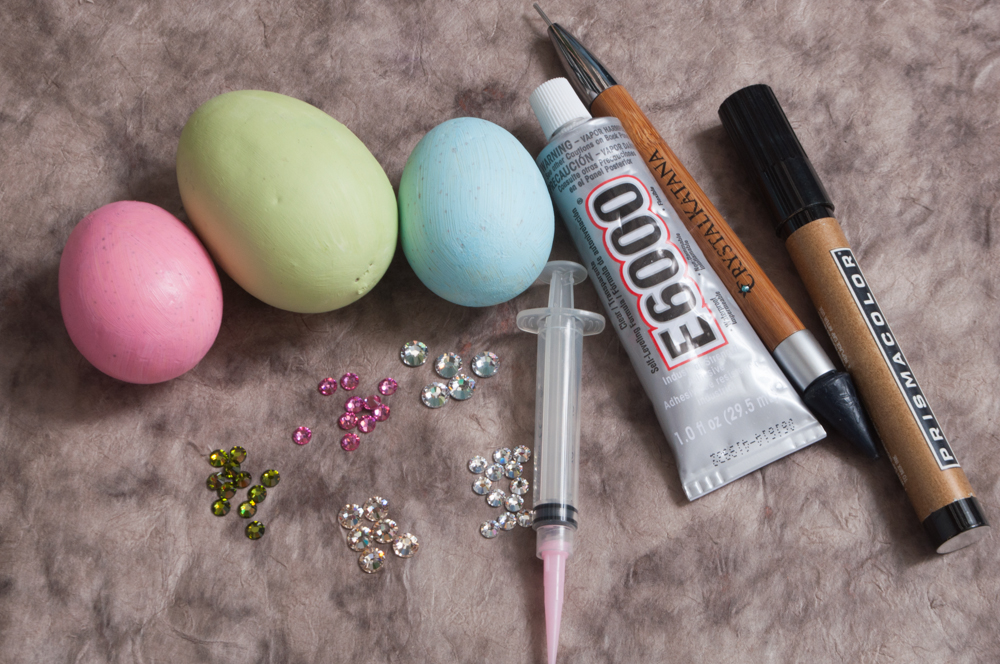
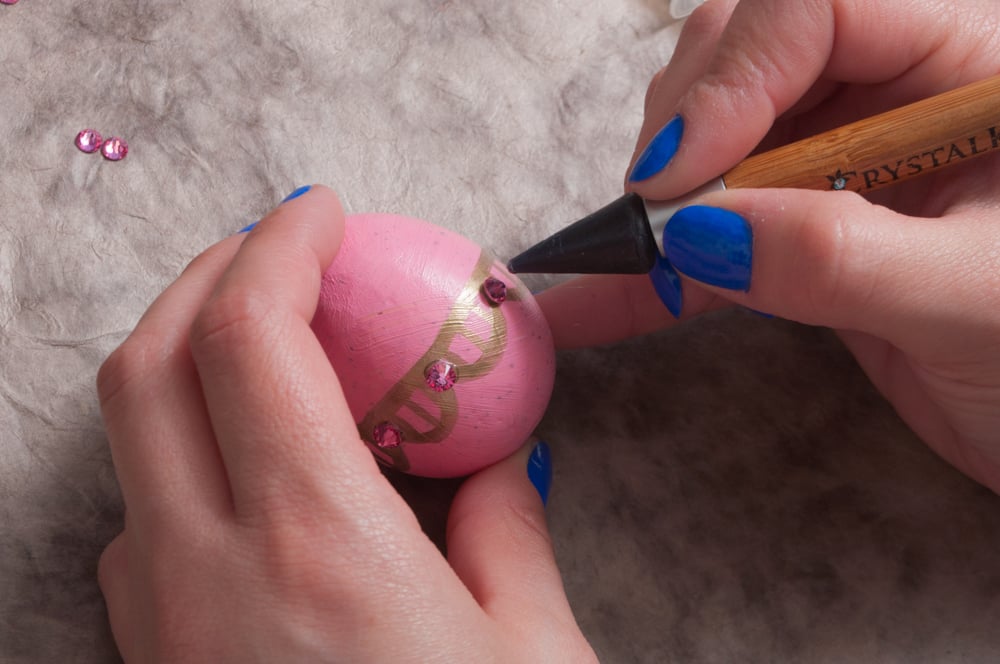
1. Create a scallop pattern with your gold pen going around the middle of the egg.


DSC_07342. Glue down a rhinestone at each scallop corner.


Pink Egg:


DSC_07291. Take your gold pen and draw a line going around the egg. Under that line draw a scalloped pattern like the green egg design. In the loop draw stripes.

DSC_07412. Glue down a rhinestone at each scallop corner.


Blue Egg:


DSC_07431. Take your gold pen an create a loop going vertical on each side of the egg.


DSC_0755 2. Create a rhinestone pattern in the center of the egg. Mirror what you do on one side to the other sign.

DSC_0762