
The best part of halloween is definitely the candy! So why not dress up your treat bag in its own little costume? We’ve put together two simple DIY tutorials for fun treat bags that you can fill with all the sweets you can get.
BAT SILHOUETTE BAG
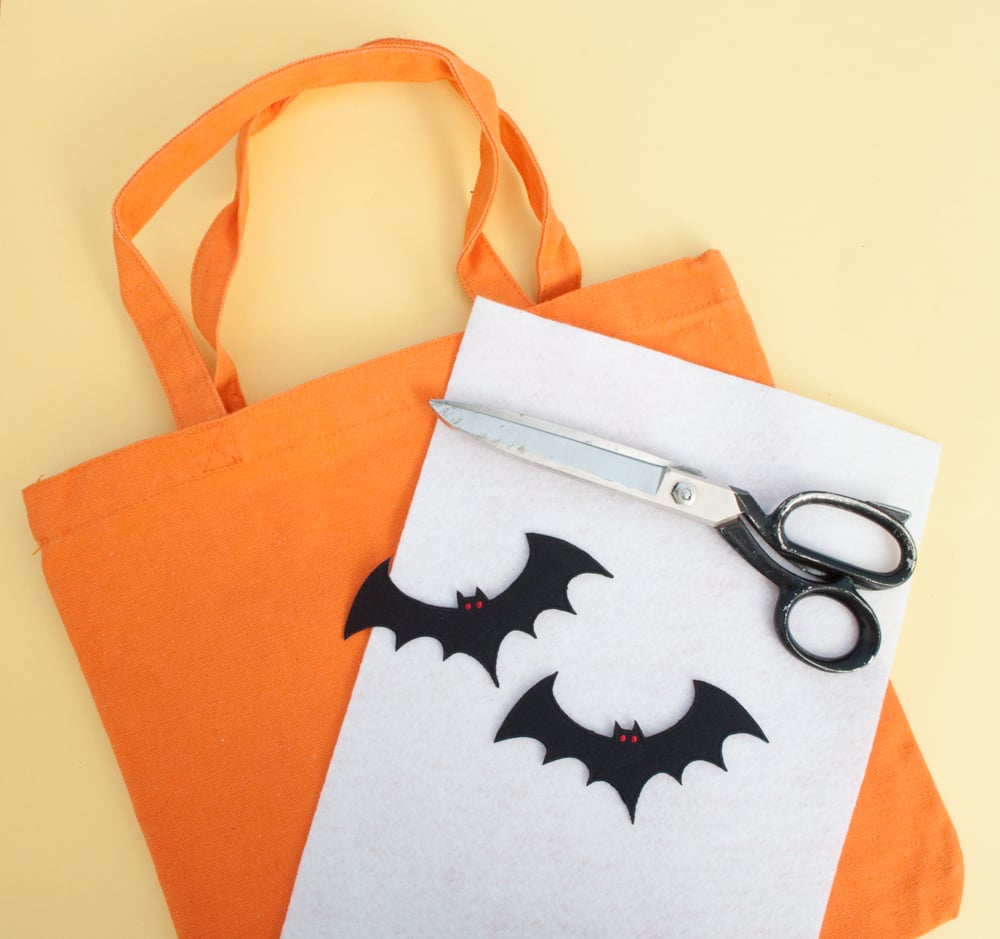
What you’ll need:
A tote bag
White Felt
Bat Iron-on Patches
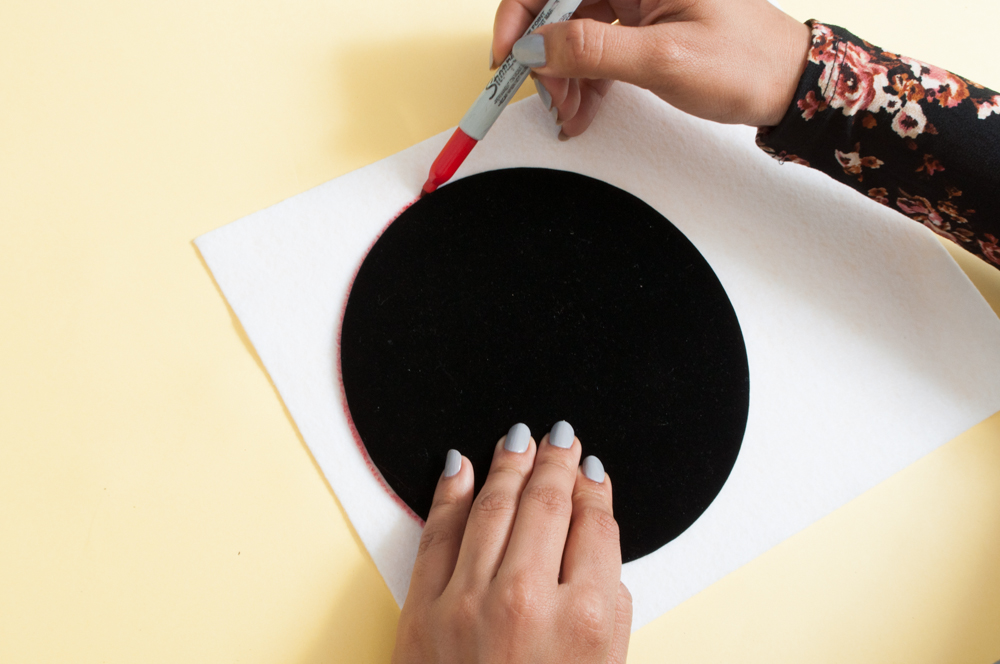 1. Trace a circle on the felt to make the shape of the moon. Make sure it’s proportionate to the bag and the patches.
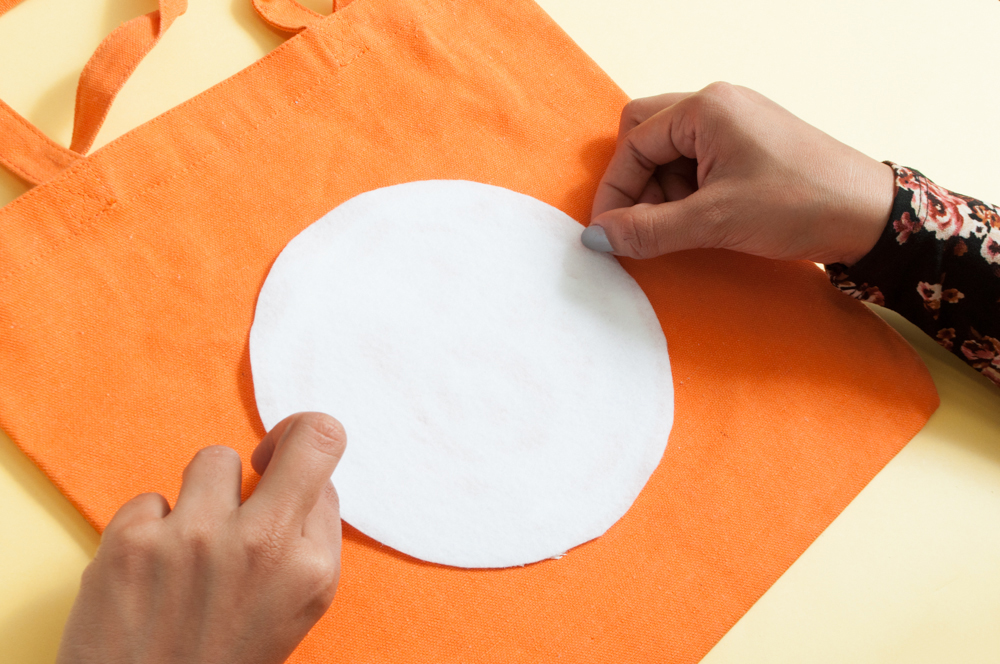 2. Cut the circle out and using the fabric glue, glue it onto the bag.
 3. Place patches as shown.
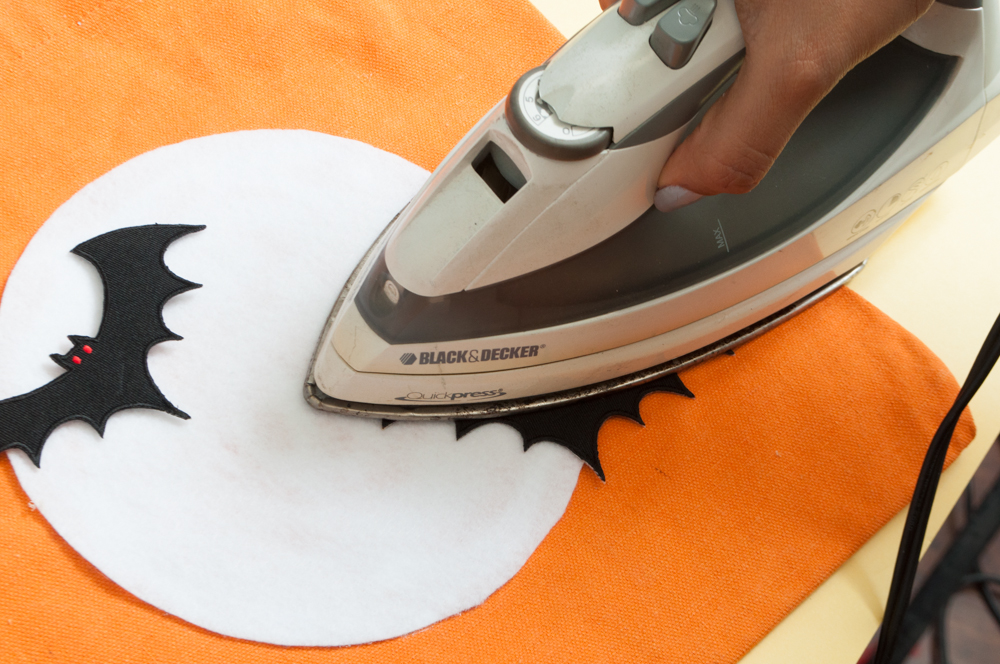 4. Iron the patches on high heat for 20 seconds each. Repeat if necessary.
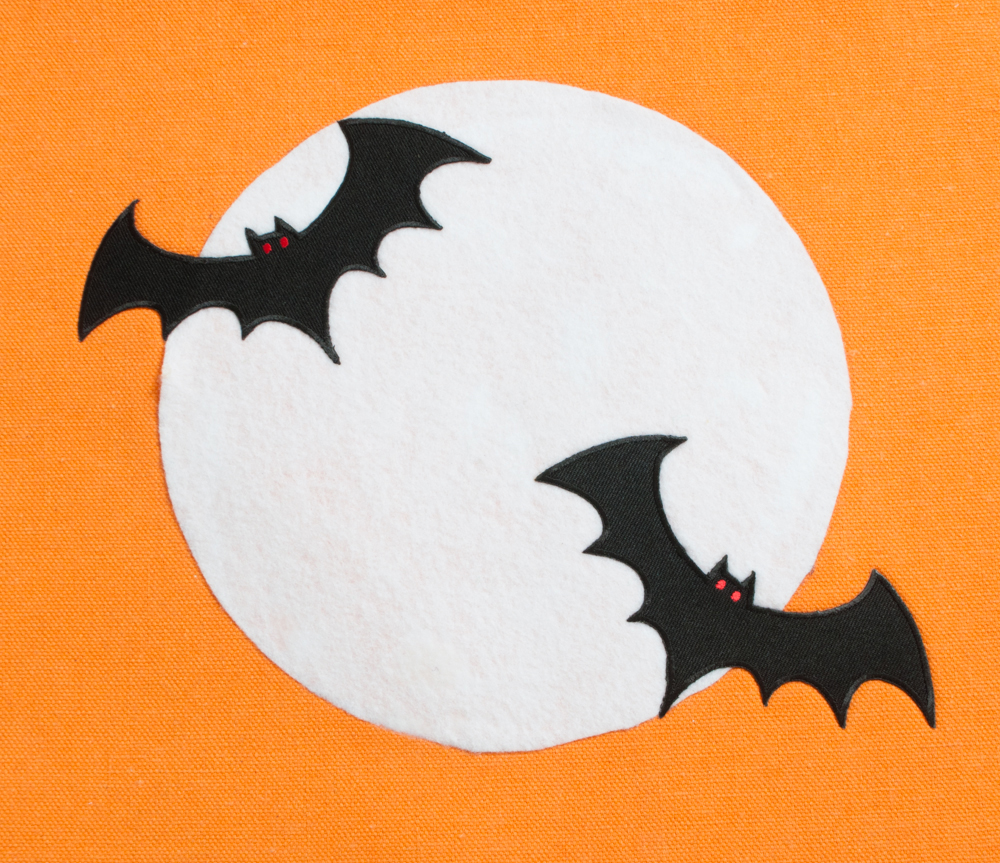
And you’re done!
FRANKENSTEIN BAG

What you’ll need:
A tote bag
Felt – Green and White
Two black buttons in different sizes
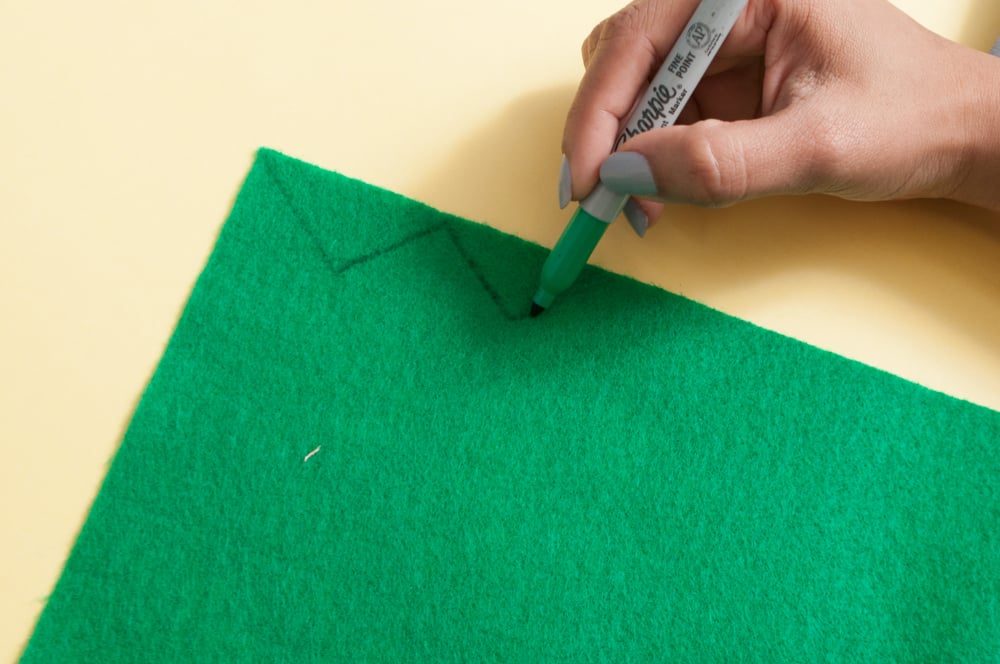 1. Draw a zig zag line on the long side of the felt sheet.
 2. Cut the felt along the line. Using the fabric glue, glue it onto the bag.

3. Cut two differently sized circles from the white felt for the eyes. Make them larger than the buttons.

4. Glue the two circles onto the felt.
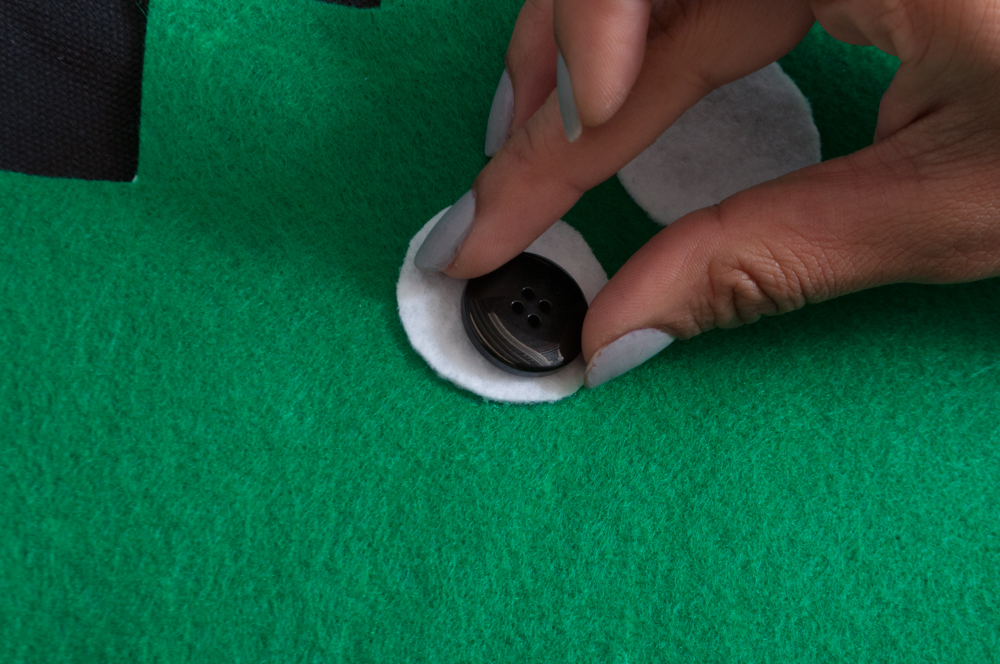
5. Glue the buttons onto the white felt, placing them closer to the bottom of the circle.

6. Cut a strip of vinyl trim to make the unibrow.
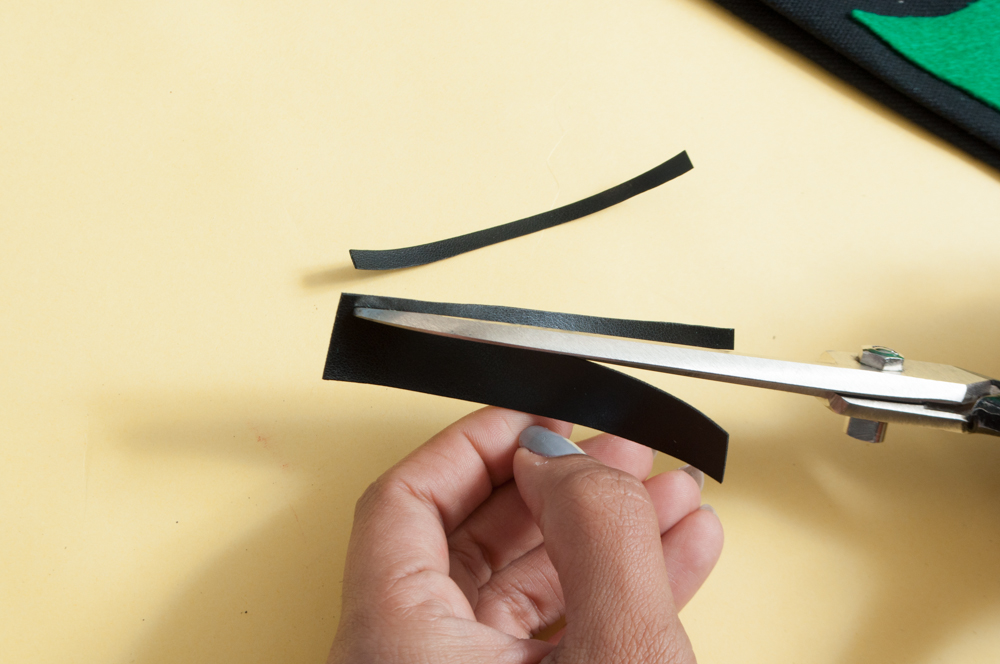
7. Cut vinyl trim into thin strips for the scar details.

8. Cut a curved mouth shape and glue all the details onto the bag.

It turned out perfect! ☺
Thank you!
So adorable!! They turned out great!
Thank you!
Cute. Simple and creative!
Thank you, glad you think so.
I’m new here and I love what you do. Greetings from Spain.
You can visit me at:
https://caprichosazules.wordpress.com/