Hello again!
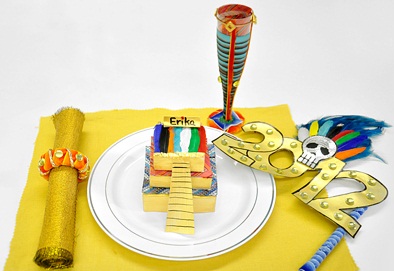
First off, I’d like to thank you for coming back and checking out the second part of my DIY project. As promised I have made another set of Mayan inspired party accessories perfect for your New Year celebration. For those who haven’t had a chance to read my first blog (check it out!), let me explain my inspiration. In the recent years the Mayans foreseeing that the world will be ending in 2012 has become very popular. Although controversial, no one can deny that the Mayan 2012 Doomsday prediction has caught attention of people worldwide. Whether it is individuals who whole heatedly believe it will happen or those who just as strongly disagree, no one can deny that the Mayan culture is intriguing, beautiful and alluring at the same time. Many bright colors shine through within the cultural art but the beautiful colors of red, blue, and gold take precedence. For the second part of my project I have created a champagne glass so you can toast your friends at midnight in Mayan style, a napkin ring, and a bracelet to match the Mayan inspired hostess necklace from the previous project. I got a few new things from the store but I mainly used the rest of my previous items. This way nothing was wasted!
Project 1
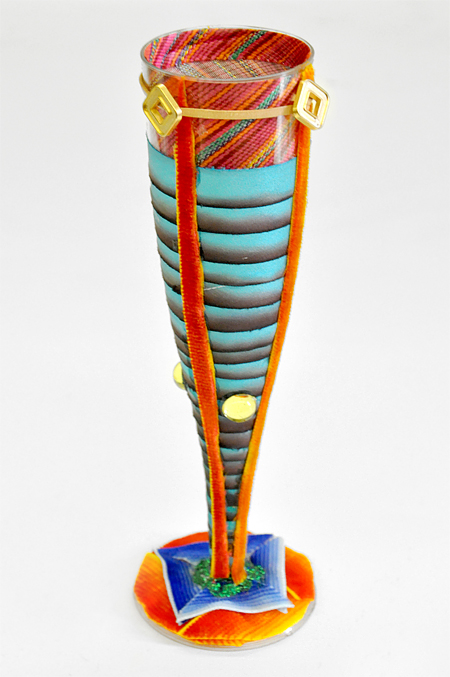
Mayan inspired Champagne glass
Glue
Scissors
Green glitter
Champagne glass
#34076 Ombre Stripe Velvet Lt.Blue/Royal
#34076 Ombre Stripe Velvet Yellow/Orange
#88739 Sew on Jewels
#49964 Buttons in gold
- Cut up the Yellow/Orange Ombre Stripe into 4 pieces. All a little longer than the base of the glass. Glue the pieces on the base until it it’s covered. It’s ok if there are pieces that are longer than the base. You can cut it to fit, later.
- Take the Lt. Blue/Royal Stripe and do the same. You can glue the stripe in any design you want. I added it for contrast.
- Take the ribbon of your choice and wrap the glass starting from the bottom of the stem, all the way up to the top or where ever you want.
- To decorate my glass I took the rest of the Yellow/Orange Ombre Stripe and cut it into thin strips. I took those strips and glued them vertically up the glass.
- I took the sew on jewels and glued them at the top end of the champagne glass stem. Don’t feel obligated to do the same. Beauty is in the eye of the beholder.
- Lastly I took the 4 gold buttons and put a string through the back. You may want to double string the back so it doesn’t allow the buttons to move around. Attach the string of buttons to the rim of the glass.
You can do this with glue or if the string you are using is strong enough just tie it on. - To add a little bedazzle feel free to add glitter. I added it at the inner base of the glass.
Project 2
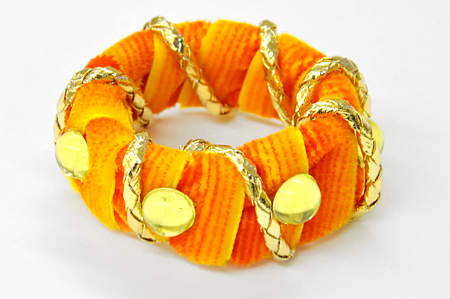
Napkin Ring
Glue
Scissors
#34076 Ombre Stripe Velvet Yellow/Orange
#88739 Sew on Jewels
4MM Braided Vinyl Bolo – Gold
Paper towel roll
- Take the paper towel roll and cut it into as many pieces as you desire. Make sure you end up with a product that is shaped like an “O”
- Take the Yellow/Orange Ombre Stripe and wrap it around your napkin ring until it is completely covered. Use glue to keep it sticking on the ring.
- Glue as many sew on jewels on the outside of the ring as you desire.
I used 7 pieces. - Next take the 4MM Braided Vinyl Boro in gold and wrap it around the roll just as you did with the Velvet stripe. I placed mine in-between each jewel but you can design your roll how you want.
Project 3
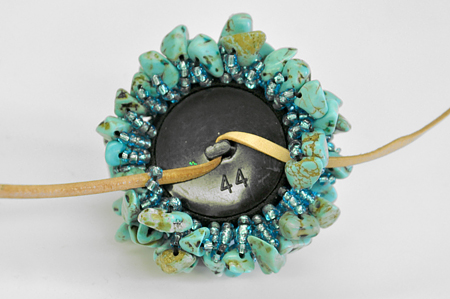
Mayan Bracelet
Glue
Scissors
#38748 Beaded Button Turquoise
#49964 Buttons in gold
8MM 60” Faux Pearl PKG – Ivory
Faux leather strand or any type of strong string
- Take one pearl and glue it in top of the gold button. Allow time to dry then glue the new created bead onto the top center of the beaded button.
- Take as many pearls as you want and glue it around the center bead. I chose to stick with two beads because I wanted to keep it simple.
Allow time to dry. - Next take your chosen strand and stick it through the back loop of the button. For more support I stuck the strand through the beading on the left and right side of the back loop.
This way the center piece of your bracelet won’t move around. - If you want you can continue to bead the string with the pearls but I personally thought it looked better without more beads.
Now you’re ready to bring in the New Year right! All these accessories are incredibly easy to make. If you do choose to make these accessories then I hope you have a very enjoyable time doing so.
Thank you for reading and happy holidays to everyone!!


What fun! Great ideas!