Tag: Sewing

DIY Spiked Shoulder Bag

1

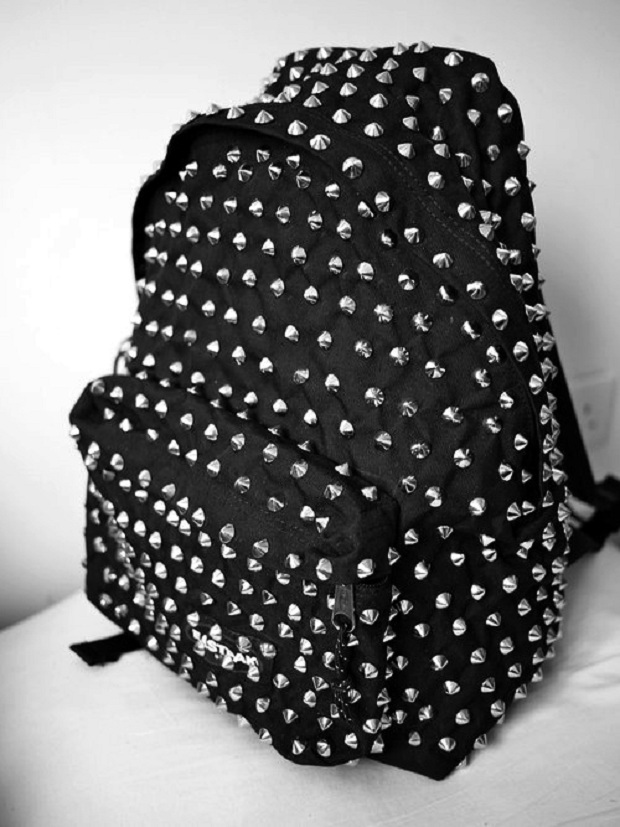
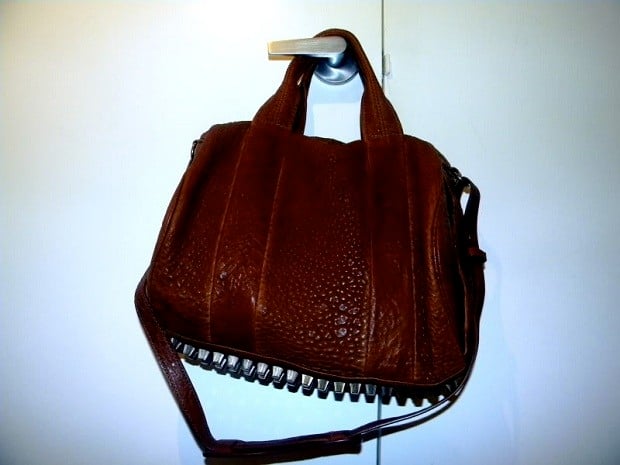
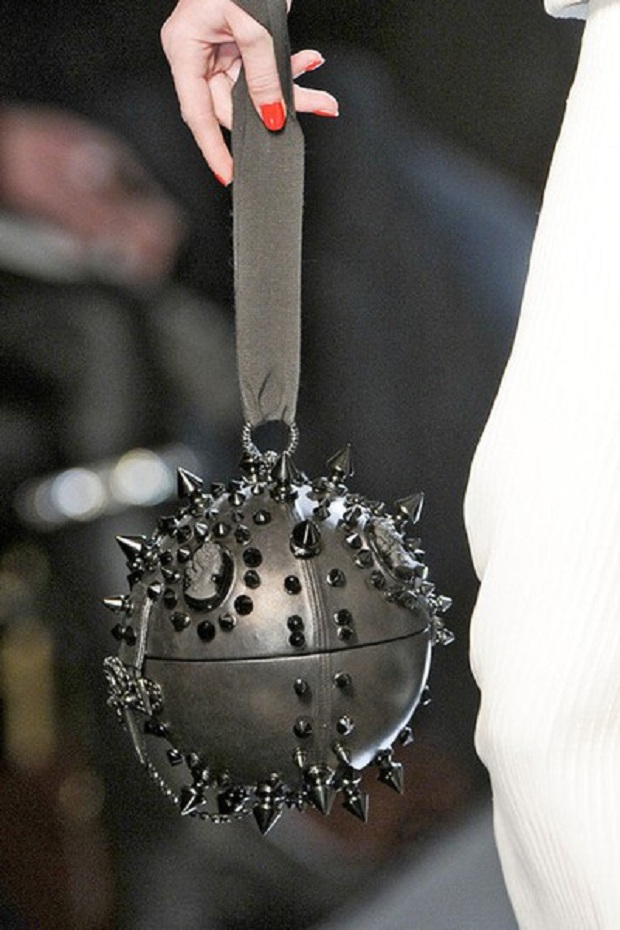
A studded handbag is exactly what we’ve been looking for to add to our closets.  When we received tons of new spikes, we knew it was time to DIY one of our own.  Inspired by Christian Louboutin’s Artemis spiked shoulder bag, we love the final look of our bag – it’s tough and chic!
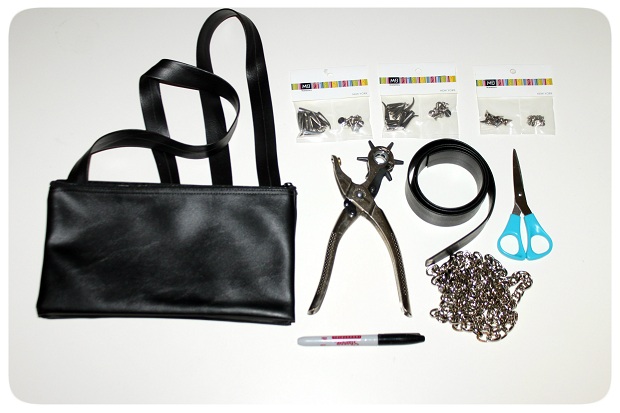
2

Supplies

Bag

Assortment of spikes (we used 2 packs of our new Curved Spikes and one 1 pack of our small Metal Spikes)

Leather Punch

1 foot of Leather Tape

1.5 yards of Chain

Scissors

Pen/Marker

Pliers (not shown)

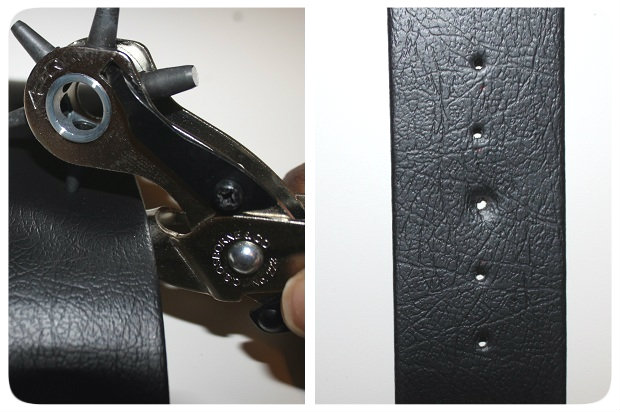
1.  Cut a piece of leather tape that drapes right over your shoulder.  Starting from the middle of the tape, add about 5 marks for where you will add spikes.

3

2.  Use your leather punch to add holes at your marks.

4

3.  Add your screws from the back of the tape and screw your curved spikes on the top.

5

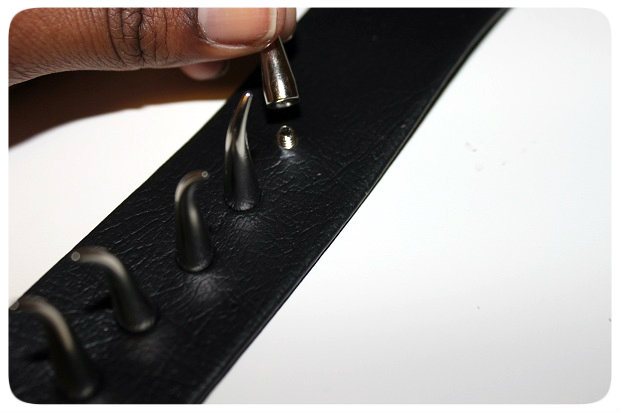
4.  Add a few more holes and spikes on the the outside of these, as depicted.

6

5.  Once you’ve added enough curved spikes, make a few smaller holes to place your small metal spikes towards the ends of the leather tape.

7

6.  Place the spiked leather piece on your shoulder and measure the amount of chain it will take to reach from the bottom of the spiked piece to the top of the bag.  Cut out two equal pieces of chain using a pliers.8

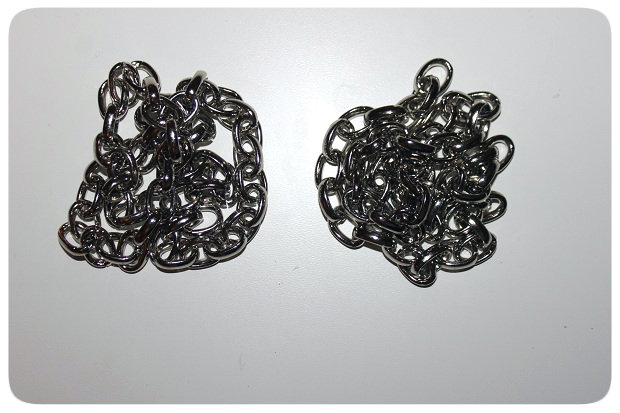
7.  Make a large hole with your leather punch close to the end of your leather piece.  Open one end of your chain, slip it through the hole, and close it with your pliers.9

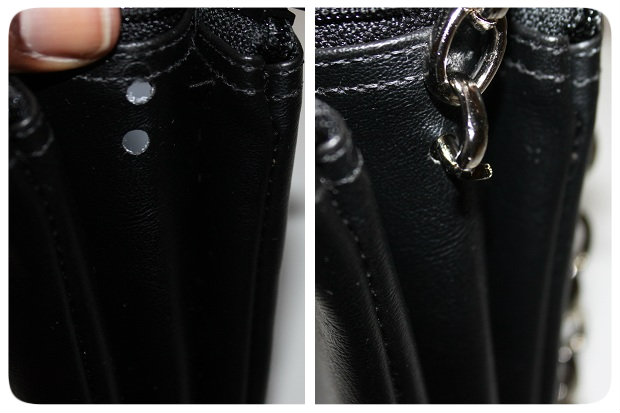
8.  Remove the handles off of your bag and create two large holes on side of the bag towards the top, as depicted.

9.  Open the other end of the chain, slip it through the holes (from the outside of the bag), and close it with your pliers.

10a

10.  Repeat steps 8 & 9 with your second chain on the other side of your bag.

11

And there you have it…you’ve created an amazing spiked leather bag!  Tag us on Twitter or Instagram if you make one of your own!

DIY Inspiration: Studded Handbag

Studded handbags have been a major outfit staple since the Olsens rocked the Alexander Wang Rocco bag a few years ago.  It’s an easy way to update a casual outfit, which is why we are totally infatuated them!  Studs, spikes, nailheads – we love them all, especially when we spot a bag studded or spiked in a way we’ve never seen before.  We are definitely inspired to create our own version!

1

2

3

4

5

1,2,3,4,5

DIY Studded Neon Fringe Necklace

If anyone remembers our fringe inspiration post from last week, you’ll know that we were obsessing over this neon fringe necklace that we saw on Chiara of The Blonde Salad. We decided to make our own edgier version with some studs and fringe from M&J Trimming. Follow along below to make it yourself!

The inspiration:

Supplies:

  • jewelry pliers
  • E6000 glue
  • a pack of cone studs
  • 1 ft chain
  • scissors
  • 1 1/2 ft short neon fringe
  • 1 1/2 ft long black fringe


1. Cut the neon fringe in half, so you have two 9 inch pieces of fringe. Spread a thin line of glue across the top of one of the pieces, then place the other piece directly on top and press them together. (This is so the fringe will be thicker and sturdier.) Do the same thing with the black fringe.

2. Draw a line of glue across the top of the black fringe. Place the neon fringe directly on top and press down. Let the glue dry.

3. Using your pliers, open a link on one end of the chain. Hook it through one of the loops in the top of the fringe and then close the link with the pliers. Do the same on the other side of the fringe. Make sure the chain is long enough to slip over your head.

4. Unscrew the studs and remove the screws, so you only have the flat studs. Space them evenly along the top of the fringe, then glue them down individually. Let them dry and you’re all set!

Refashion Your Old Jacket!

By Blerona

Refashion your old jacket with some modern buttons. It’s time to start saving and wearing what you already own. And an easy way to do that is by updating your old jacket with some new buttons, something so simple makes all of the difference. That’s what I did with my pea-coat below, I changed my old black w/ red line simple buttons with new pyramid buttons. And I love the look!


Materials:

  • Black Thread & Needle
  • 2 15mm Square Raise Button W/Shank Item#41660 – Old Gold
  • 2 20mm Square Raise Button W/Shank Item#41660 – Old Gold
  • 10 25mm Square Raise Button W/Shank Item#41660 – Old Gold
  • For buttons call 1.800.9.MJTRIM or check out our many other buttons!


Sew-on Jewel Bib Necklace on Martha Stewart Show

Not too long ago M&J Trimming was featured on the Martha Stewart show.  Martha’s in house designer, Hosanna Houser showed the audience how to create fashionable jewel bib necklaces using M&J’s merchandise.  We are currently flooded with phone calls and emails regarding the sew-on jewel used on Hosanna’s necklace.  So to answer your questions, here are some information. 

Hosanna used an assorted color and sizes of glass sew-on jewels on the sample necklace.  On her necklace she used the champange/silver mesh sew-on jewels.  If you missed the episode and would like to watch it again, please click here.

Fall Season, New Trend, Easy DIY Alterations

By Dara

jacket

After Alterations

The weather is starting to get a little breezy and that is definitely a sign that summer is long gone.  That means it is time to put away those summer clothes and bring out the warmer clothes for Fall.  Fall is usually a fashionista’s favorite time of the year.  It is not too cold nor is it too hot.  It is a perfect time to wear comfortable and trendy clothing.  This week, we brought out the classic black blazer and embellished it with a variety of Swarovski buttons, crystal trims, pearl strands and braided lace or frogs.  Below, you will see a before picture and above is after the alteration.  It is very easy to get this chic look with simple supplies and instructions. 

Jacket5

Before Alterations

You can see there is a big difference in the before and after image.  This Fall, dramatically embellished garments are very popular.  For the blazers, you will notice in a lot magazines that the shoulders are embellished with different materials.  A lot of deisgners are using fringe, and feathers.  However, crystal jewels are the most used to embellish blazers.  Why spend thousands of dollars when you can create your own unique look.  For the unique look on the blazer, I mainly used Swarovski buttons andvarious trims. 

jacket2


Materials:

jacket3

Instructions:

  1. Pin the lace on top of the shoulder according to how you feel it fits best. Then either stitch on the lace or use Unique Stitch glue.  It works just like a needle when applying fabric on fabric.
  2. Decide where you would like to add the buttons on the shoulder and easily stitch them on using the needle.  It is really up to you how you want to design the shoulder.  The main idea is to make it dramatic. 
  3. Add the pearl strands and rhinstone trim along the side and then add a button over where you started the trim.
  4. Do not forget to replace all the old buttons with a different style of glass buttons.  When you do this, your friends will barely notice it is the same blazer from last year. 
  5. When it is done, then you are ready to wear it and show it off. 

jacket4

Helpful Tips for Your at Home Sewing Projects

By Roseann

sew_mach_are_scary

In 1982 President Ronald Reagan declared September national sewing month “in recognition of the importance of home sewing to our nation.” This could not be truer today; the theme this year is “Reuse, Remake, Restyle.” Our blog has been dedicated to the do it yourselfer since the beginning and in the spirit of the month I’d like to share some helpful sewing tips in hopes that your creative projects this month go a little smoother. I have put together a list of the most helpful tips for what I’ve found to be the most common hang ups in a sewing project.

Golden Rule

The single most important thing to do before you even cut your fabric is to wash it. If this is not done your fabric will shrink and your garment may not fit after the first wear. Keep in mind that the width will shrink more than length; consider that you will probably lose about 10% of your width after washing when deciding how much fabric to purchase. Before washing my fabric I like to serge the cut edge, you can leave the selvage as is, this prevents fraying. If you do not have a serger at home a zigzag stitch can be done along the very edge, it works the same.

Gathers

Gathering for me has always been a bit of a pain. Pulling on basting threads can often times cause them to break and cause uneven gathers. If you created a zigzag stitch over a piece of dental floss instead of basting be sure not to get the floss in the stitches, it’s much easier to control gathers and will not break.

Curves

Sewing curves can be daunting, I cannot tell you how many times I have had to pull stitches and restitch to smooth out pinching and create a smooth line. To gain more control reduce your stitch length around curves and corners. It helps greatly. Reducing stitch length can also be done at the beginning and to end seams instead of backing up which can be difficult with very thin fabrics.

Matching Stripes and Plaids

You can spend all the time you like on a project but if your fabric patterns and prints don’t match at the seams, no one will notice the rest of your hard work. There’s a easy way to match your patterns pieces so that your garment doesn’t end up looking like an unintended Picasso. Cut out your patterns pieces one at a time. Cut one side then use the fabric you just cut as the other side, be sure to flip it over you want mirrored pieces. Fabric to fabric will help you line up your lines.

DIY Easy Decorative Picture Frame

By Dara

picture_frame

It’s been a while since I last wrote an Arts & Crafts blog.  So here I am today, finally updating after so long.

 I’ve been contemplating on getting a puppy lately.  Can you guess what kind of puppy?  Yes, I want a bull dog.  They’re just so adorable.  I know a lot of people think they’re ugly, but they just make me so happy whenever I see one.

Well, I haven’t gotten one yet, but I did get a poster with three cute puppies on them.  The wall in my office is kind of dull right now, so I decided to place the small poster in a picture frame.  It’s not just any picture frame.  It’s one that I handcrafted myself and is pretty proud of it.  The best part is that it was fun and anyone can do it. 

If you want to make one similar to mine, you’ll need is a small foam core board (you get this at an arts and crafts store.  You’ll only need one small enough to fit your picture with an extra inch around all corners of the picture.  You’ll also need one weight sheet protector, cords, sequins, sew-on jewels, glue-gun, double sided tape and a pair of scissors.

Using the double sided tape, attach your picture of the center of the form core board.  Trim the weight sheet protector to fit over the board.  You can tape down along the edges.  Use the glue-gun for attachment, start decorating the frame according to your style.  It’s really that simple. 

frame2