Tag: DIY

DIY: Tassel Pillow

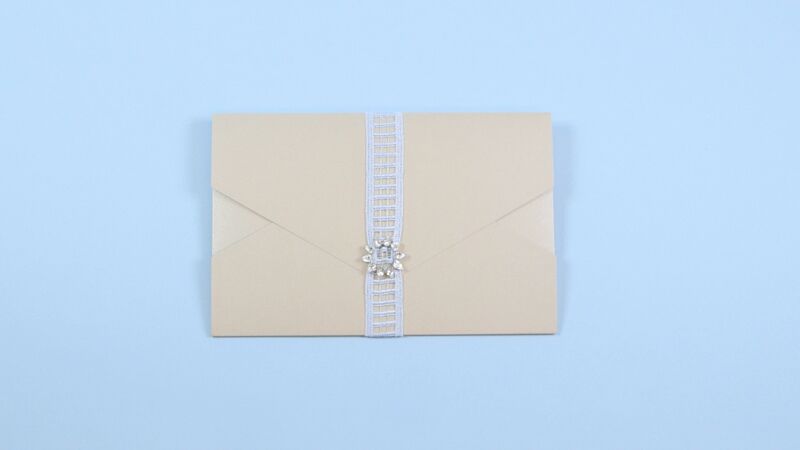
Have an old pillow you want to give some life to? Just grab a few tassels and add them all around. Tassels are a fun addition to a lot of home decor projects. Check out how we updated this pillow:

What you’ll need:

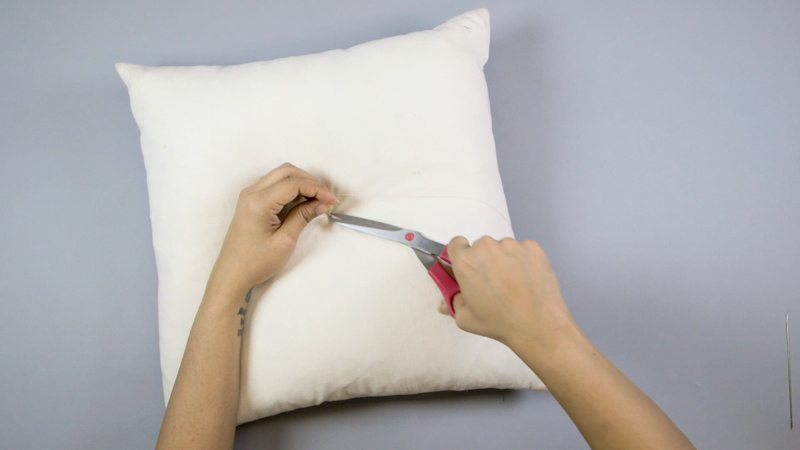
A pillow cover/pillow

Tassels

Needle and Thread

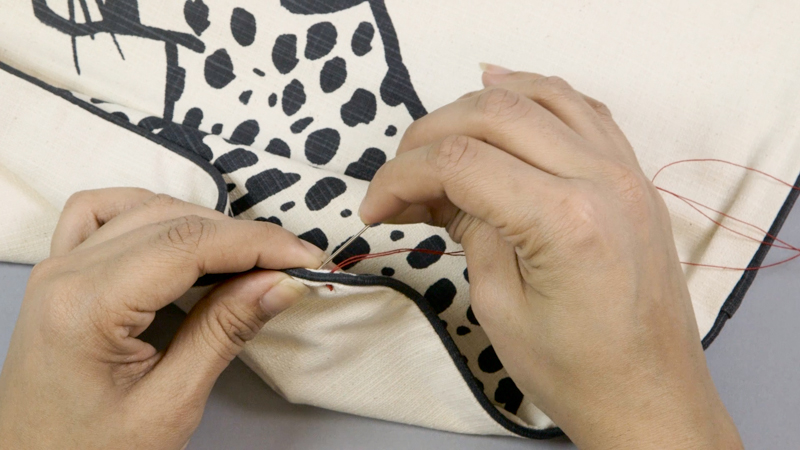
Step 1: Starting with a corner, sew a stitch from the back of the pillow and then sew it back through.

Step 2: Using the loop on the tassel, fasten it to the cover by repeating the first step.

Step 3: Just add more tassels all around the pillow.

And you’re done!

Check out this video for more ideas on making cool pillows:


DIY: Tufted Pillow

One of the easiest updates you can give a throw pillow is the classic tufted look. It looks complicated but it’s so simple to do. You can do this with armchairs, cushioned benches and pretty much anything with cushion/padding that you can tuft. Check out the video at the bottom of the page if you want a quick tutorial on how to tuft pillows.

Disclaimer: If you’re going to tuft something, it’s going to stay that way. So if you have a pillow with a cover and an insert, make sure you’re not going to want to change it in the near future.

What you’ll need:

Throw Pillow

5 Buttons of your choice – We used This One*

5 Small Buttons

Decorator’s Needle

Extra Strong Thread

Pencil

Step 1: Mark where you want the tufts.

Step 2: Tie a knot at the end of the thread. Pull the needle through to the other side (through your marking)

Step 3: Thread the needle through the button’s shank. Pull the needle through the pillow to the back.

>Make sure you pull the thread through as tightly as you can.

Step 4: Thread the needle through the smaller button that will anchor your main button.

And you’re done!

Check out the video to see how to make this pillow and two others:

*This item is currently unavailable. Check out our full selection of buttons.

DIY: Pom Pom Flowers

You know those DIY tutorials that are so simple you catch yourself asking, “Wait, what’s the catch?”. Well there is no catch! It’s just that simple to make these adorable pom pom flowers that you can use to brighten up a space. The best part is you can keep them simple or get creative and make some elaborate flowers with different sizes of pom poms.

What you’ll need:

Big Pom Poms

Glue Gun

Sticks or Thin Branches

Scissors

Step 1: Trim the sticks to the length you want. I cut mine about ten inches.

Step 2: Cut the pom poms from the trim.

Step 3: Add a some glue to the end of one stick with your glue gun and stick a pom pom on. Apply glue and add a couple of more pom poms to create a flower. I varied the number to make different shapes.

Aaaand *drum roll* you’re done.


DIY: 4 Ways to Decorate Easter Eggs

What are you more excited about – Easter or Spring? Or both? At M&J we love it when spring comes around because we can create colorful DIYs in beautiful spring colors. Plus, I like the warmth!

The best thing about easter is decorating the eggs (and eating the candy). Since I love spring so much I was inspired to do my eggs with a floral theme. Here are four ways you can incorporate flowers into your Easter eggs:

RHINESTONE FLOWER EGG

What you’ll need:

Hard boiled egg

Gem-Tac Glue

Rhinestones 

Sequins

Tweezers

Step 1: Apply a dot of Gem-Tac to the egg.

Step 2: Using the tweezers pick up a rhinestone and place it on the glue. Apply glue around the rhinestone and create a flower with more rhinestones. The number of rhinestones depends on the size. We used SS20.

Step 3: In between flowers, glue a sequin as a filler. Top it off with a rhinestone. If you want to skip this step you can.

And you’re done!

FLOWER CROWN EGG

What you’ll need:

Hard boiled egg

Floral Trim 1

Floral Trim 2

E6000 Glue

Sharpie

Step 1: Draw two curved lines for the eyes. Add short lines for eyelashes.

Step 2: Apply glue towards the top of the egg. Stick the first trim around the top of the egg and cut off excess.

Step 3: Apply glue on top of the first trim. Stick the second trim on top, going around the egg. trim off the excess.

That’s it. Your egg is now ready for a music festival!

NEON STUDS AND PAINTED FLOWERS EGG

What you’ll need:

Hard boiled egg

Neon studs

Acrylic paint

Paintbrushes

Gem-Tac Glue

Step 1: Apply a dot of glue and using the tweezers place a stud on it.

Step 2: Taking a small paintbrush, make small petals around the stud. To get even petals, make a small circle and then extend it on one side. Repeat with different colors.

And you’re done!

DAISY PATCH EGG

What you’ll need:

Hard boiled egg

Daisy stick on patch

Green marker

Step 1: Stick daisy patch in the center of the egg.

Step 2: Make little leave around the flower with the green marker.

That might have been the easiest DIY EVER!

Hope you have fun making these Easter eggs! Would love to see what you make. Tag us on Instagram @mjtrimming or on Facebook www.facebook.com/mjtrimming.

DIY: Gucci Inspired Studded Acid Wash Denim Jacket

Who would have thought these trends make a comeback! Studs on Acid Washed Denim! Gucci this Spring took these popular 80s trends, put them in a blender and out came this:

We thought we’d take this hot trend and turn it into a fun, easy DIY. We love recreating runway looks for those of who you love fashion but don’t want to break the bank. The first thing we did was hunt for the perfect denim jacket – something slightly oversized to match the current trending silhouette. We bought a classic blue Talbots denim jacket and headed back to HQ to get started on the project.

What You’ll Need:

Step 1: Remove all the buttons from the jacket. We wanted to replace the plastic buttons on the jacket with cool metal ones. This step is optional. If you like the current buttons on your jacket, skip this step.

Step 2: Fill a spray bottle with bleach. Make sure you wear rubber gloves to protect your skin. We advise that you work in a well-ventilated area when working with bleach. Keeping the bottle about 6 inches from the jacket, start spraying in random sections. Don’t spray too much! You’ll notice the color stripping away. Let it dry and then wash it.

Disclaimer: Bleach strips dye from fabric and sometimes reflects the undertones present in the dye. For example, you might see yellowish or pinkish tinges based on your denim’s original wash/dye.


Step 3: Start attaching the studs. For the studs with prongs, poke it through the fabric and use pliers to bend the prongs inward into the hollow of the stud. For the studs with screws, use a sharp tool (scissors/awl/X-Acto knife) to make a small hole and push the screw in. Then screw the stud onto the screw.

Starting at the shoulder, attach as many studs as you like.

Step 4: Sew on the new metal buttons. Again, this step is optional.

And you’re done! If you wanna buy this jacket go here. Hurry! There’s only one.


Studs used in our project:

Small Metal Spikes with Screw
Large Cone Spike with Screw
Medium Spike with Screw
Small Flat Nailheads
Cone Nailheads


DIY: Wedding Invitation with Ladder Lace Trim

Wedding season is around the corner! Spring weddings are all about DIY! Need some wedding invitation inspiration? We’ve got you covered! Here are some simple DIY invites to make your wedding extra special!

What you’ll need: 

Envelope

Metallic Ladder Lace trim

Brilliance Star Buckle

Scissors

unspecified-11.jpg

Step 1: After stuffing envelope, measure ladder lace trim around outside of envelope once, leaving excess trim to be tied at the end. Cut with scissors.

unspecified-12.jpg

unspecified-13.jpg

unspecified-14.jpg

Step 2: Weave trim through rhinestone buckle. Place rhinestone in the center of the trim.

unspecified-15.jpg

unspecified-16.jpg

Step 3: Place rhinestone and trim on opening on envelope. Tie knot in the back.

unspecified-17.jpgunspecified-18.jpg

Simple and elegant is always the answer!

unspecified-19.jpg


Don’t forget to check out our youtube video!


DIY: Wedding Invitation With Lace And Rhinestones

A little sparkle goes a long way! This elegant wedding invitation is a great and easy DIY! We’ve broken it down for you!

What you’ll need:

Cardstock Envelope

Lace Trim

Brilliance Sew-On Jewels 

Gem- Tac

Glue Syringe

Scissors

unspecified-11.jpg

Step 1: Fill glue syringe with Gem-Tac.

unspecified-12.jpg

Step 2: Measure lace trim around envelope once. Cut excess with scissors.

unspecified-13.jpg

Step 3: Apply small amount of Gem- Tac with syringe to end of trim and seal. Allow time to dry.

unspecified-14.jpg

Step 4: Using syringe, apply small amount of glue to center of scallop and place rhinestone. Allow time to dry. Continue this until end of trim.

unspecified-15.jpg

unspecified-16.jpg

unspecified-18.jpg


You’re special day will be sure to sparkle with this DIY!

unspecified-19.jpg

Watch our full tutorial!


DIY: Wedding Invitation Sleeve with Velvet and Lace Trim

Spring weddings allow for some color and fun! Mix it up with this DIY invitation sleeve! The soft blush velvet and white lace trim are the perfect touch for the season. We made it simple for you with these easy to follow steps!

What you’ll need:

Invitation sleeve

Velvet Trim

Lace Trim

Brilliance Heart Buckle

Scissors

unspecified-11.jpg

Step 1: Measure white lace trim around sleeve equally on both sides. Use scissors to cut.

unspecified-12.jpgunspecified-13.jpg

Step 2: Measure velvet trim to equal lace, with excess on each side. Weave brilliance heart buckle through velvet trim until centered. And place velvet trim on top of lace.

unspecified-14.jpg

unspecified-15.jpgunspecified-16.jpg

Step 3: Tie both lace and velvet trim around card on back side. Tie ends tightly with knot. Use scissors to cut excess velvet.

unspecified-17.jpgunspecified-18.jpg

Flirty and sweet for this special day!

unspecified-19.jpg


Watch our youtube tutorial for a step by step process!


DIY: Floral Patched Bag

Fashion week told us one thing: florals aren’t going anywhere this season! We’ve got you covered! We’ve broke down this DIY floral patched, rhinestoned bag just for you! Check out our easy steps below to be ahead of the trend!

DSC_0165

What you’ll need:

Black Bag (Fabric works best)

Rose Patch

Floral Bunch Patch

1 yard floral jacquard trim

2 colors of rhinestones

Gem-Tac

Iron

Needle/ thread

Scissors

Tweezers

unspecified-1.jpg

unspecified-2.jpg

Step 1: Place patches as desired on bag. Carefully, press hot iron over patches and hold for 20 seconds. Repeat if necessary. Be careful of the metal zipper!

DSC_0169.gif

unspecified-3.jpgunspecified-4.jpg

Step 2: Remove strap from bag. Using scissors, cut strap and remove from the buckle. Cut floral trim to desired length.

unspecified-5.jpg

unspecified-6.jpg

Step 3:  Weave floral trim through metal buckle. Fold the end and sew it together.

unspecified-7.jpg unspecified-8.jpg

Step 4: Apply thin layer of gem-tac to floral patch. With tweezers, place rhinestones over desired area. Allow time to dry!

DSC_0208

And you’re done! Sport the latest trend this spring without breaking the bank.


Oscar 2017 Fashion Roundup

The 59th Annual Academy Awards marked the end of award season this passed Sunday. And though it proved to be a more interesting show (hint hint: the biggest blunder in Oscar history), the fashion never failed to make us swoon. We picked our favorite looks of the night.. AND to make it even more fun, we pulled products inspired by the looks so you can create your own versions!

Here ya go!

Emma Stone Oscar.jpg

Best Actress winner, Emma Stone stole the show in this metallic gold, fringe Givenchy gown. Shop our metallic fringe trim!

kate-bosworth-oscars

Kate Bosworth was a vision in this J. Mendel ballerina, tulle gown. We love the accent of velvet!

emma roberts oscars.jpg

Emma Roberts took the plunge in Armani. Use our beaded rosette trim for this bustier look!

Selma Hayek Oscars.jpg

Selma Hayek stunned in this illusion black lace Alexander McQueen gown. Shop our sequin embroidered black lace trim!


Nina Dobrew oscar.jpgNina Dobrev had all eyes on her in this sheer Dior number with elastic straps. Shop our elastic to accent your pieces!

Janelle monae oscars.jpg

And last but definitely not least, Janelle Monae in Elie Saab Couture. This gown is just WOW! Shop our rhinestone appliques to get this look!