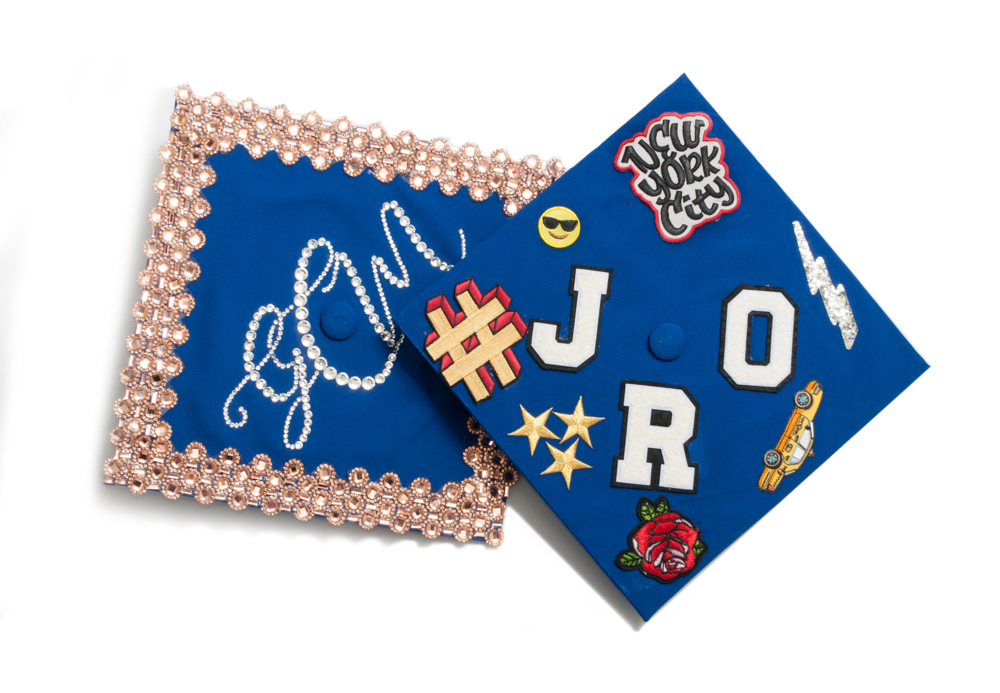
Graduation time is here! Nothing is more exciting than putting on your cap and gown and walking across the stage. But those plain cap and gowns they give you are a bit boring, now there is nothing wrong with being just another cap in the crowd. But if you want your family to be able to spot you from the bleachers, go out in style by decorating your cap. Here are two great ideas on how to stand out and show your individuality.
Cap #1: Decorate with Patches

Customize your cap with some of your favorite things, and what better way to show your style then with patches?

What You’ll Need:
- Graduation Cap
- Patches
- Iron
- Thin cotton cloth
NOTE: Make sure you know which is the front of your cap so your design sits properly.
Step 1: Grab an assortment of patches in various sizes and play around with the layout until you’ve got it right.

Step 2: Iron the patches for 20 seconds each on high heat (no steam). Repeat if necessary.(Use a thin cotton cloth over the patches, to protect them)

Viola! You’re finished.
Cap#2: Decorate with Rhinestones

What You’ll Need:
- Graduation Cap
- Monogram print out
- Rhinestones
- Iron-On Rhinestone Trim (we used this one)
- Iron safe transfer paper
- Iron
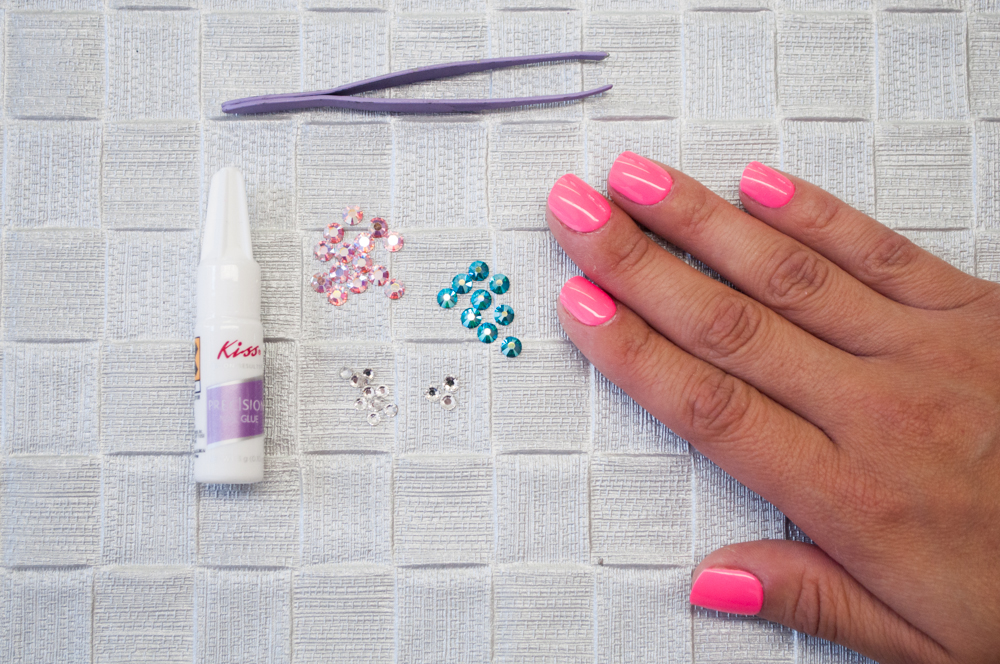
- Tweezers
NOTE: Make sure you know which is the front of your cap so your design sits properly.

Step 1: Choose the font and size you want your monogram (or quote) to be and then print it out . Make sure to print the “mirrored” version so it is the correct way once it is on your cap. For this we used the font Paduka Script

Step 2: Place your monogram under the transfer paper and peel back the protective layer to reveal the sticky side.


Step 2: Fill in your monogram with rhinestones. Put the rhinestones flat back up, jewel side down, so that the top of the jewel is on the sticky part of the transfer paper.

Step 3: Transfer to your cap. Carefully put your cap over the transfer paper and flip both over. Then position your monogram where you would like it to go.

Step 4: Iron on. Place a thin cotton sheet over the transfer paper and iron your monogram onto your cap. About 30 sec in each place then move around until its on there good.


Step 5: Lay out your trim. We cut this trim so it was a little thinner. Measure each side with the trim and make sure to account for any overlap in corners so that the trim lays flat all around.

Step 6: Iron on your trim. Just like with the rhinestones, place a thin cotton sheet over your trim and iron on. Holding for about 30 sec or until it is not loose.

That’s it, you’re all done!


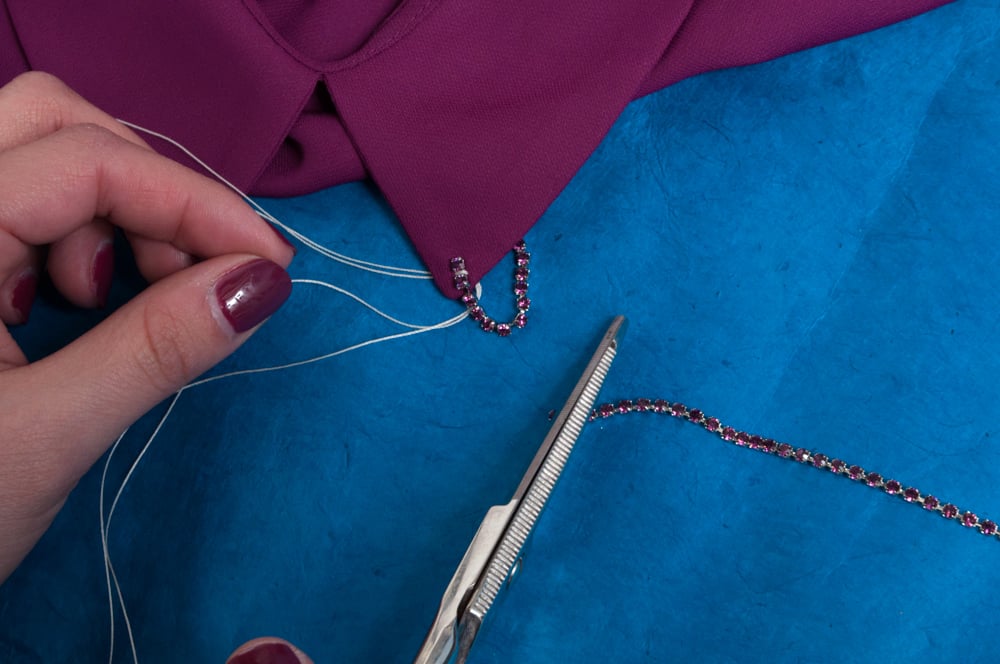
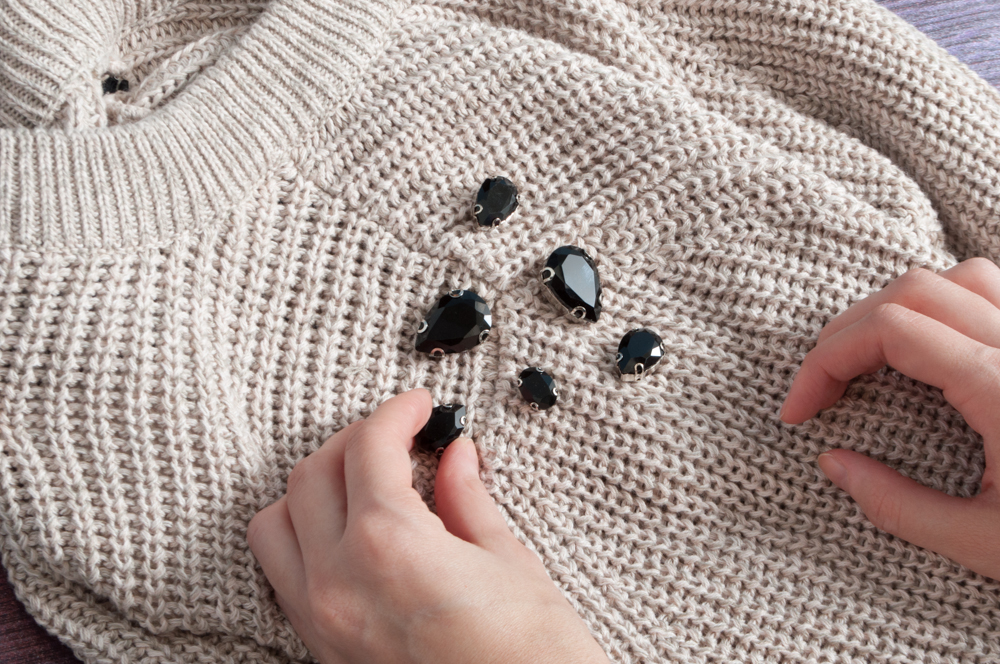 1. Place
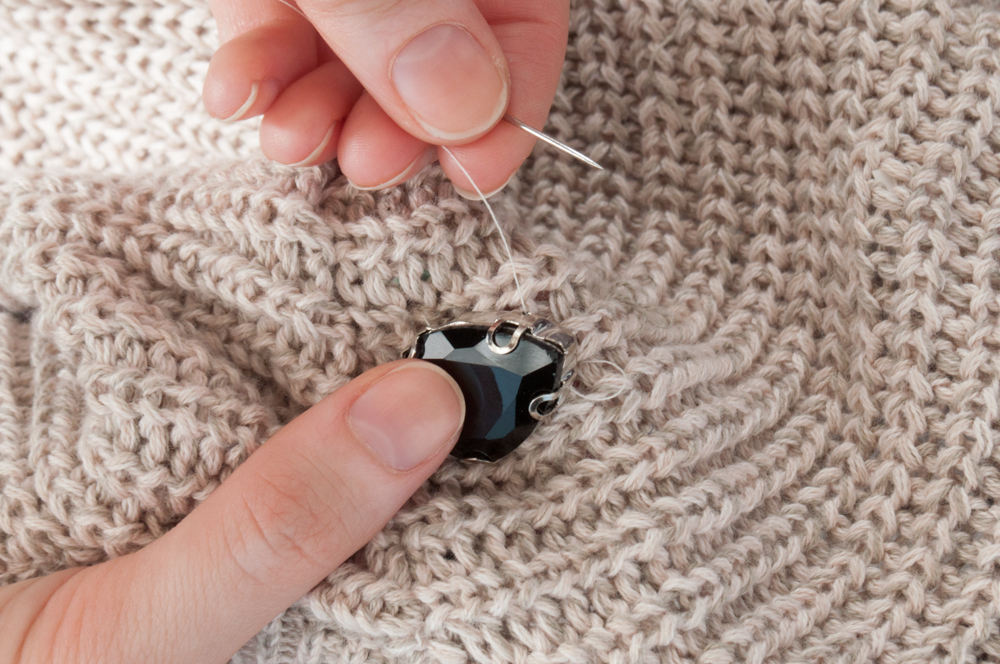


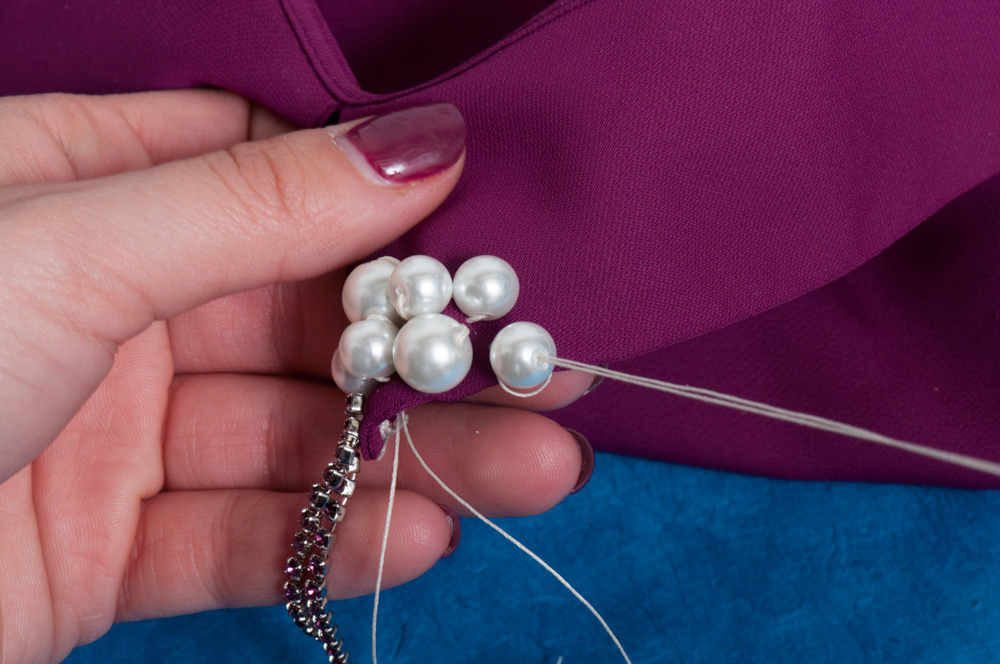 4. Sew your pearls onto the tip of the collar above the rhinestone trim. Repeat on the other side.
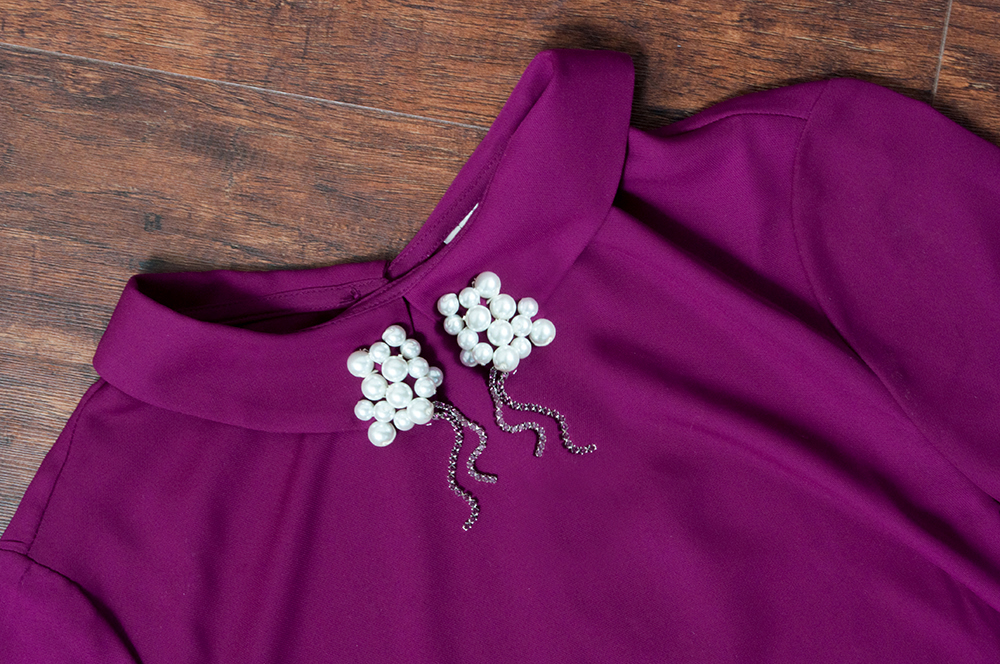


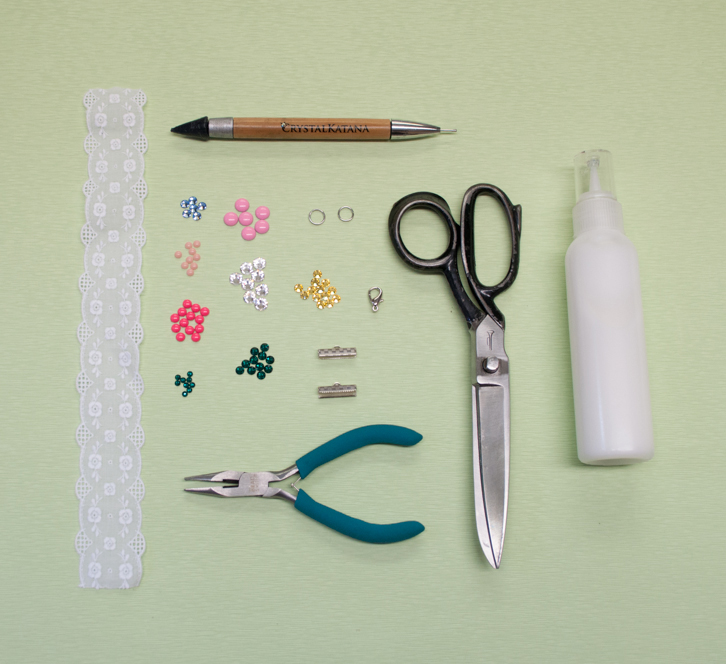
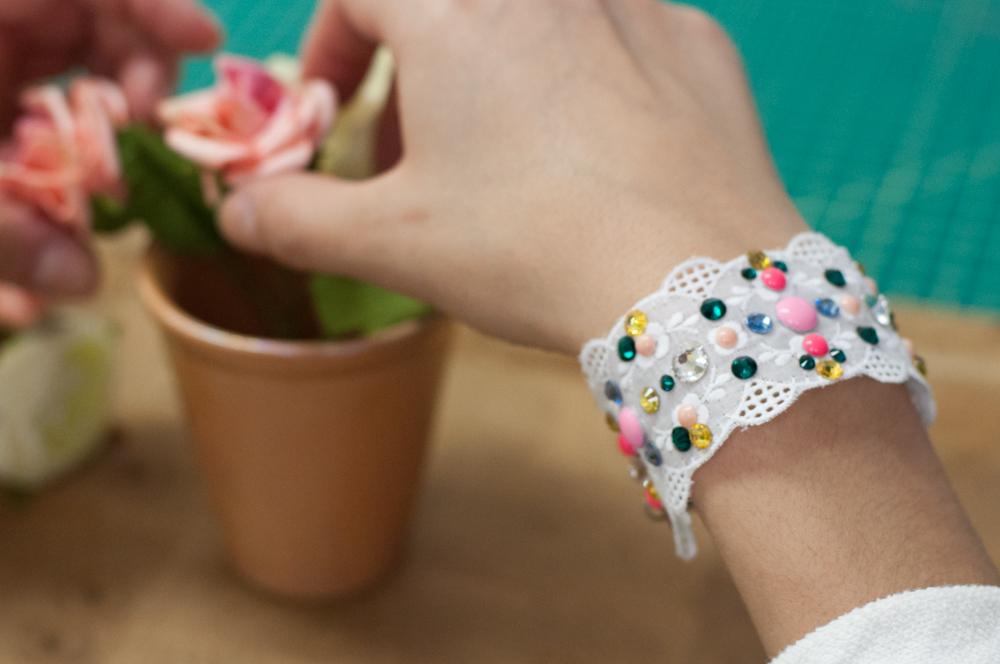
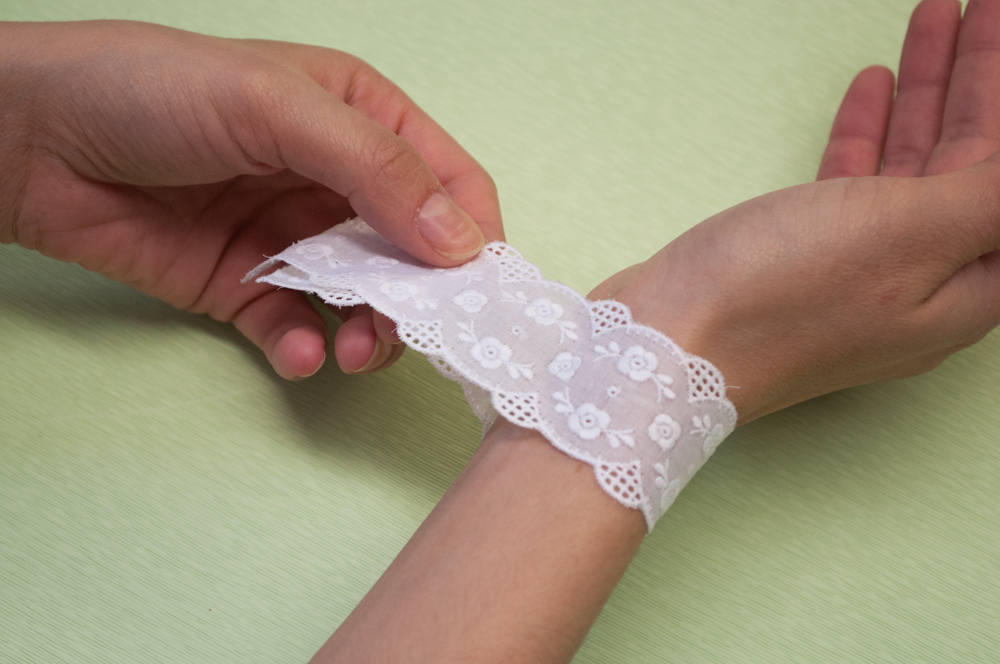 1. Wrap the lace trim around your wrist, and measure how long the lace is when it overlaps on your wrist. Add an inch to that number, and cut.
 2. Fold your lace over half an inch, so that the crimp closure will have a thicker grip.
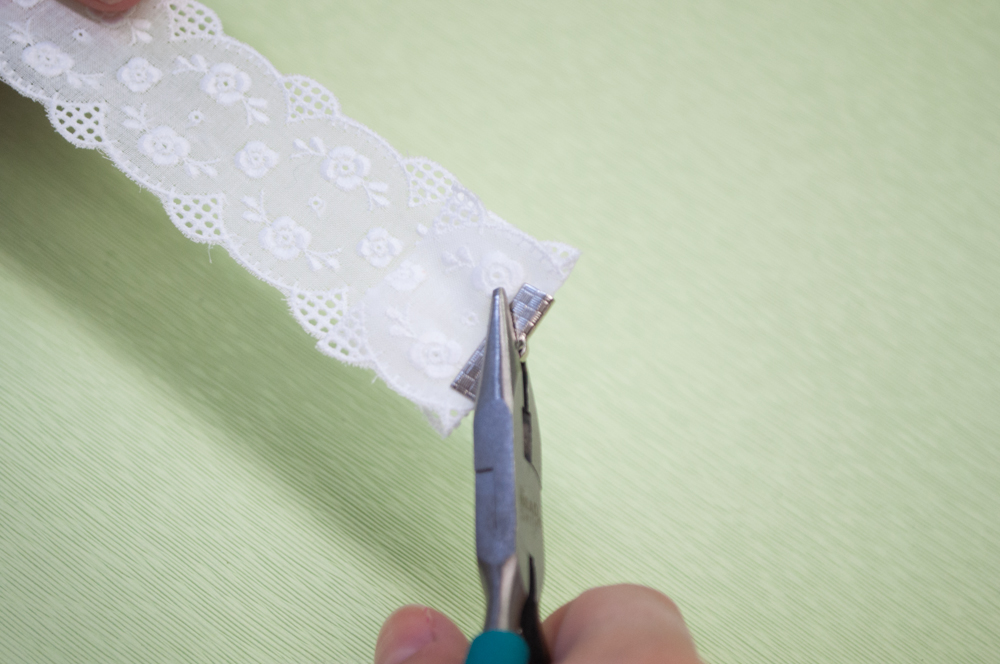 3. Place the crimp at the end of your folded lace, and clamp down. Repeat on the opposite side.
 4. Connect your jump ring and lobster clasp, and then connect each end to a jump ring.
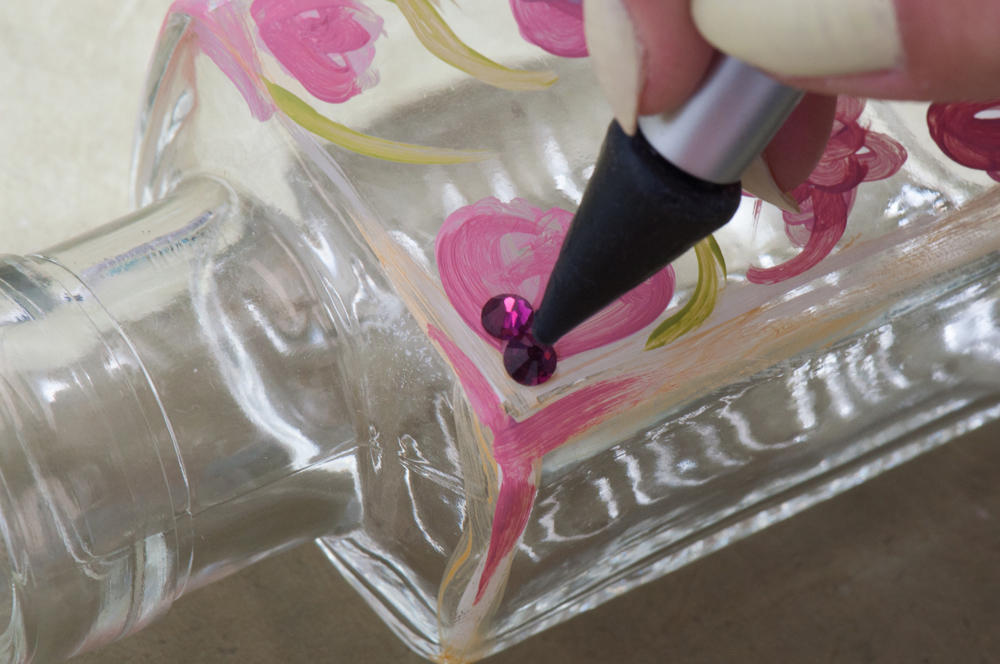
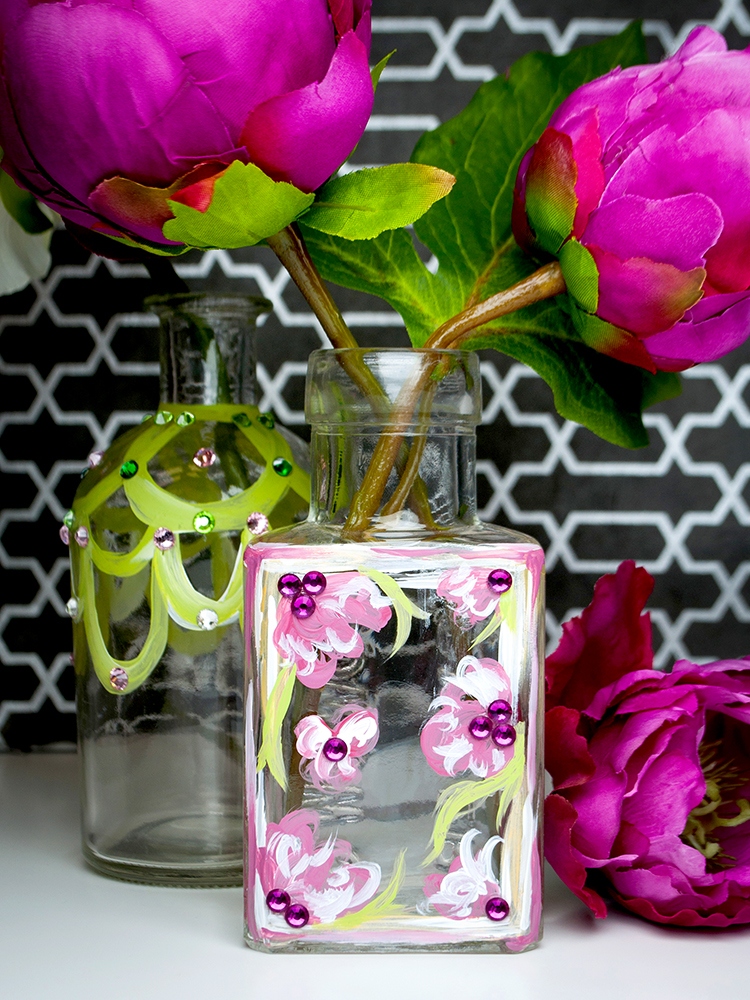
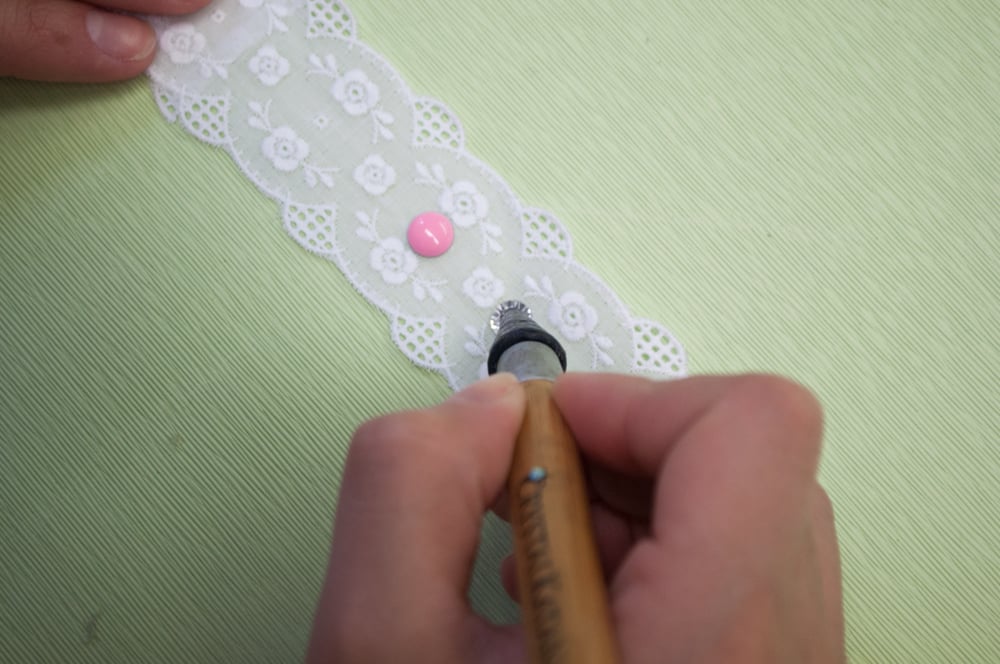 5. Now it’s time to design! Lay out your bracelet, and create the pattern you want using rhinestones and nailheads. Use your crystal katana to easily pick up and place the rhinestones.
 6. Once you’ve laid out your pattern, glue down each stone. Let the bracelet dry overnight.